

Cavity space
Modern masonry veneer walls rely on a durable waterproofing membrane and clear drainage space to manage water intrusion. Accordingly, the reconfigured mass masonry wall must have enough depth to allow for the new structural elements, a waterproofing membrane, and a proper drainage space.
At a minimum, there is typically a 9.5-mm (3⁄8-in.) space for both the waterproofing membrane and drainage cavity created by removing the collar joint between the outer and middle wythe. Where possible, it is best to increase this space to at least 16 mm (5⁄8 in.) by either pushing the outer wythe beyond the existing plane of masonry or by cutting into the middle wythe. With a narrow cavity space, a drainage mat can prevent a mortar bridge to the backup wall from clogging the cavity.
Aesthetics
Though keeping the same cladding type helps maintain the building’s historic nature, there will be some trial and error in finding a brick that matches the existing unless the scope includes a complete recladding or salvaging the existing brick (if possible). Additionally, the drip edge of any new metal flashing will be slightly visible from grade.
Building use and occupancy
In evaluating repair alternatives, issues concerning building use and occupancy often play a significant role. First, how sensitive are building operations to leakage? The cost and disturbance of invasive repairs may be warranted for occupancies particularly sensitive to leakage; in laboratory spaces, libraries, and museums, for example, water can interfere with research or precious documents.
Secondly, will the building be occupied during the construction project? If it can be vacated or occupants relocated in sequence, the designer will have greater options in reconfiguring the wall, particularly when addressing the interior wythes. If the building must remain occupied, the designer should consider leaving the inner wythes in place and try to reduce the noise during construction.
Project cost
The engineering and construction costs to perform this work are significant, and the price tag must be evaluated against the expense of ongoing building maintenance, such as pointing, installing clear sealers on the brick, and reinstalling sealant joints. The ballpark construction cost to cut and point the masonry joints and install a clear sealer is about $30 per square foot, whereas the cost to retrofit the masonry wall to a veneer wall can range from $100 to $400, depending on the type of repair. Further, older buildings typically have many hidden conditions that can lead to additional work and change orders.
A typical case study
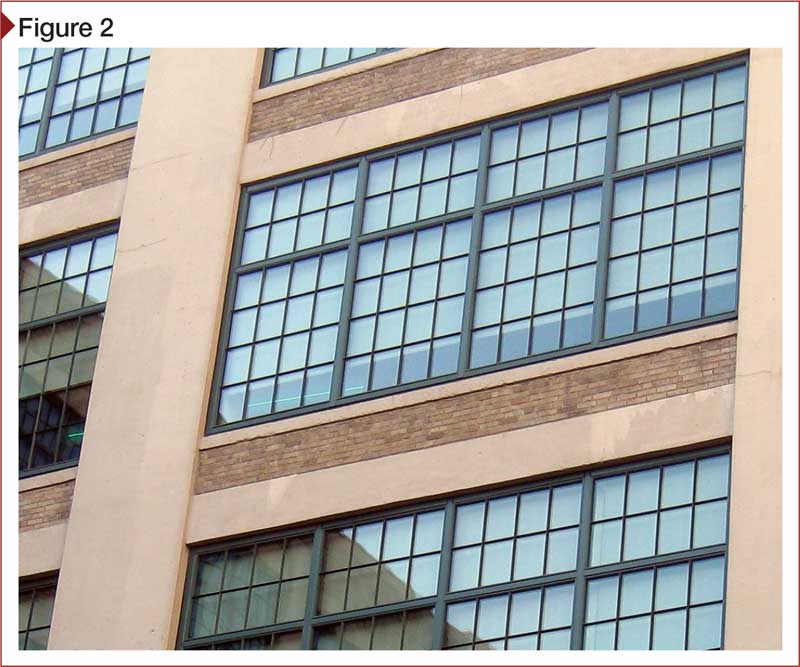
This case involves a 1920s building in eastern Massachusetts. It had a façade consisting of exposed concrete structural frame with multi-wythe infill walls between the exposed concrete floor slab and concrete window sill, and with multi-wythe brick masonry parapet walls (Figure 2).
The old manufacturing plant was converted to an office and laboratory space, and the current occupants have had to contend with leakage during wind-driven rain events. Occupants typically complained of leakage through the window, but water tests confirmed it was leaking through the brick masonry and cracks in the exposed concrete frame. The owner was presented with a trio of repair choices:
- Option One: Pointing the brick masonry and applying a siloxane coating over the surface. (This method would require ongoing maintenance and may not completely solve the leakage problem.)
- Option Two: Cladding the exterior walls with metal panels, exterior insulation finish systems (EIFS), or stucco.
- Option Three: Rebuilding the multi-wythe brick masonry into a veneer wall.
The owners chose the third option because they wanted a repair with high probability of eliminating leakage (which ruled out Option One) and the building is historically significant to the community, deterring the owner from changing the aesthetics (ruling out Option Two). The repair work was to proceed while keeping the building occupied, and with minimal disturbance—there was to be no interior work and limited noise disruption.
Before construction began, exterior openings were made to determine how the lateral loads of the windows and walls were transferred to the concrete columns. The columns were notched so the masonry was keyed into them, but unfortunately, the concrete window sills were not continuously reinforced with steel. Therefore, they could not be relied on to transfer the loads of the windows to the concrete columns. Instead, new reinforcing steel was designed and installed below the concrete sill to transfer the lateral load to the columns; the path for the dead load of the window and masonry was reestablished through the structural steel and remaining inner wythes of brick to the floor slab.
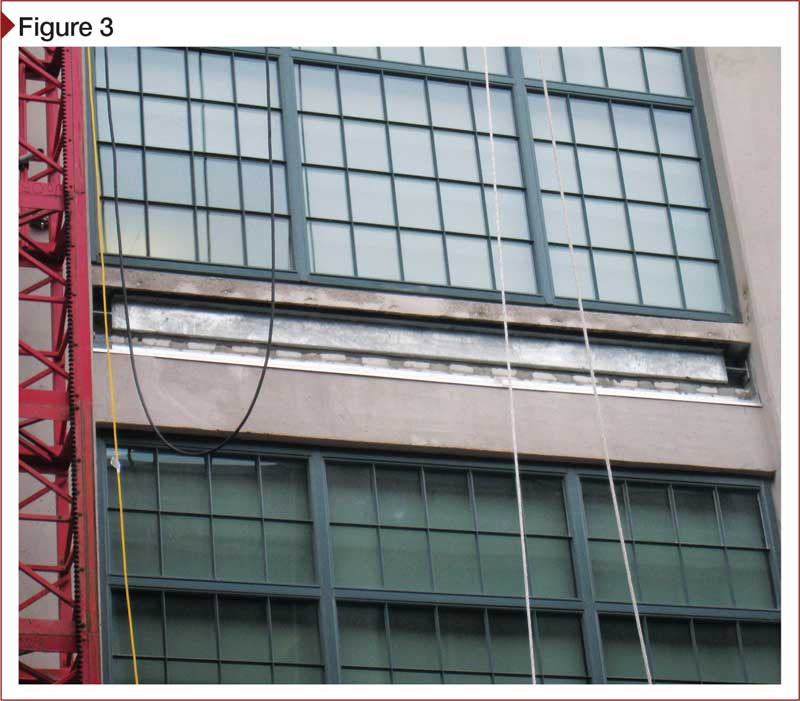
New hollow structural steel (HSS) members were designed to span in the horizontal direction between columns (under the concrete sill of the windows), a distance that varied from 1.2 to 6.1 m (4 to 20 ft). The general scope included:
- removing the outer wythe of brick masonry, shoring the concrete window sill and window above to remain in place;
- removing the middle wythe of brick masonry at the location of the new horizontal tube and attaching it to the concrete columns at either end and the concrete sill above (Figure 3);
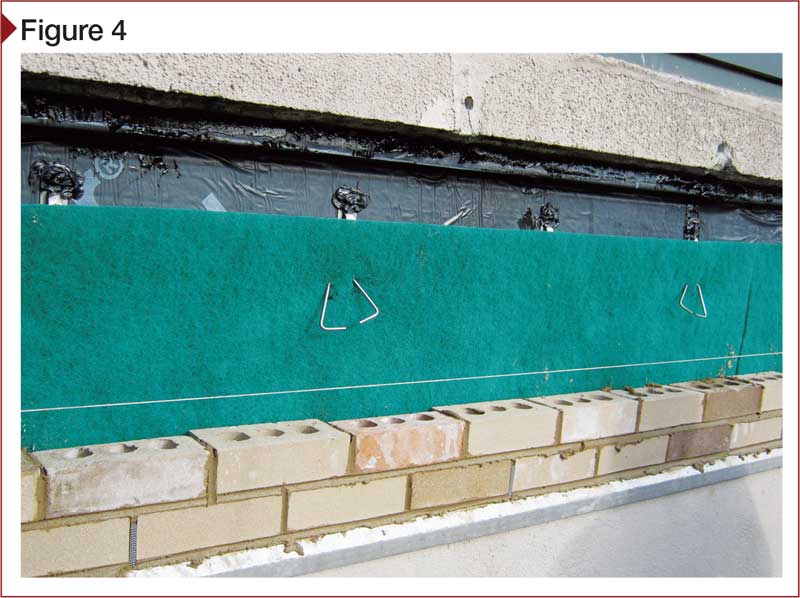
- pointing the backup wall and providing a non-shrink grout at all openings, including above and below the steel tube; and
- installing new through-wall metal flashing, self-adhered waterproofing membrane, drainage grid, masonry ties, and brick veneer to match the original brick (Figure 4).

