Adhered Manufactured Stone Veneer: Manufacturing performance for the winter
by Katie Daniel | November 9, 2017 3:13 pm
 [1]
[1]by Chris Hines
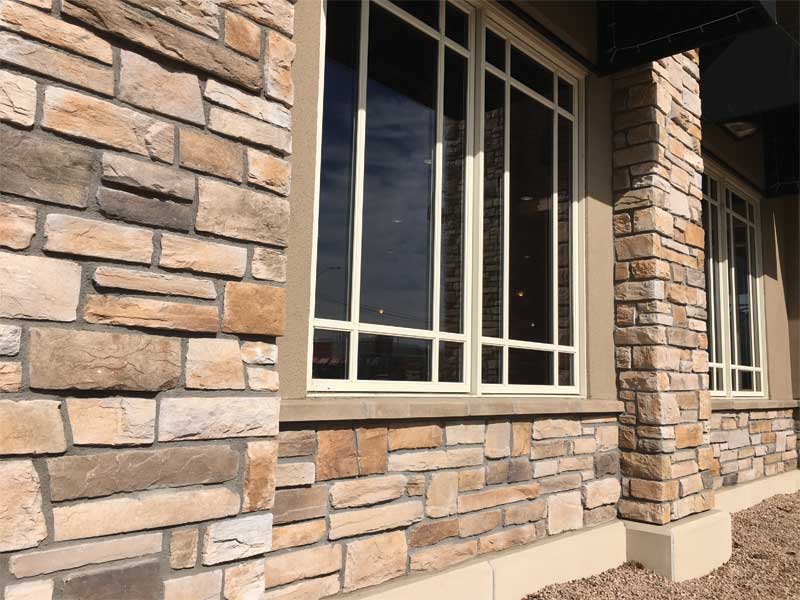
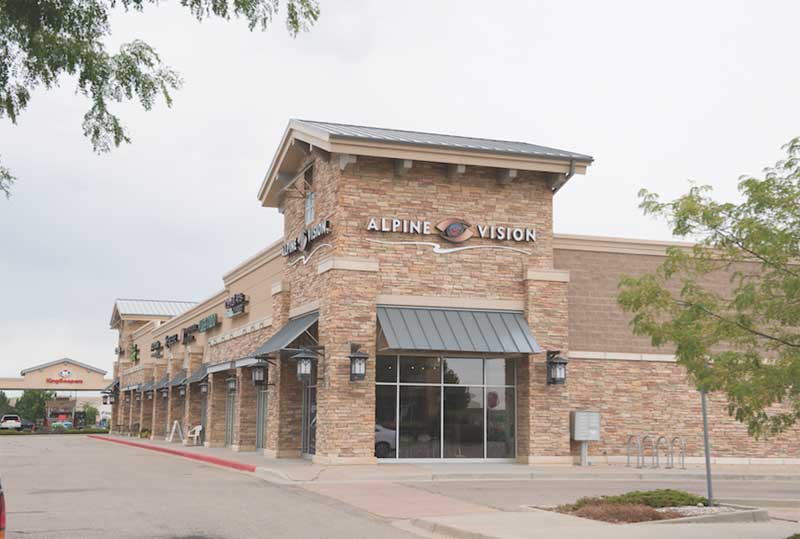
Stone has long been admired as a building material that not only looks beautiful, but also withstands the test of time. From the Great Pyramids and parts of the Colosseum to some of the oldest homes in America, many stone structures still stand after centuries. Further, the stone market continues to evolve. Adhered manufactured stone veneer (AMSV) offers remarkable design possibilities that provide the appearance and durability of natural stone without the associated weight or installation costs. When properly manufactured, designed, and installed, this material makes it possible to achieve design visions coupled with lasting performance.
The Masonry Veneer Manufacturers Association (MVMA) defines AMSV as:
a lightweight, architectural, non-loadbearing product that is manufactured by wet cast blending cementitious materials and aggregates, with or without pigments, admixtures, or other materials to simulate the appearance of natural stone and other masonry materials.
(For more information, consult Masonry Veneer Manufacturers Association’s [MVMA’s] “Installation Guide and Detailing Options for Compliance with ASTM C1780.”)
However, not all manufactured stone is the same. Selecting AMSV from a reputable stone provider is the foundation for durable construction with strong performance in cold weather and extended exposure to wet conditions. It is important to look for products that have undergone stringent third-party testing under organizations and standards such as International Code Council Evaluation Service (ICC-ES) AC51, Acceptance Criteria for Precast Stone Veneer, or ASTM C1670, Standard Specification for Adhered Manufactured Stone Masonry Veneer Units, which verify quality, reliability, and consistency of building materials. AMSV produced to the highest-quality testing standards often comes from manufacturers with an ANSI Accredited Evaluation Service Report (ESR).
Once the right AMSV has been selected, proper installation practices are crucial to achieving a durable system. When working in areas that experience harsh winter weather, installation is the time to ensure the project is weatherproofed to stand up to months of freezing temperatures and the elements. Careful installation through approved methods is vital to the longevity of any siding—improperly done, it opens the door to moisture intrusion, poor drainage, and deterioration. Even the finest materials will fail when exposed consistently to water intrusion.
 [2]
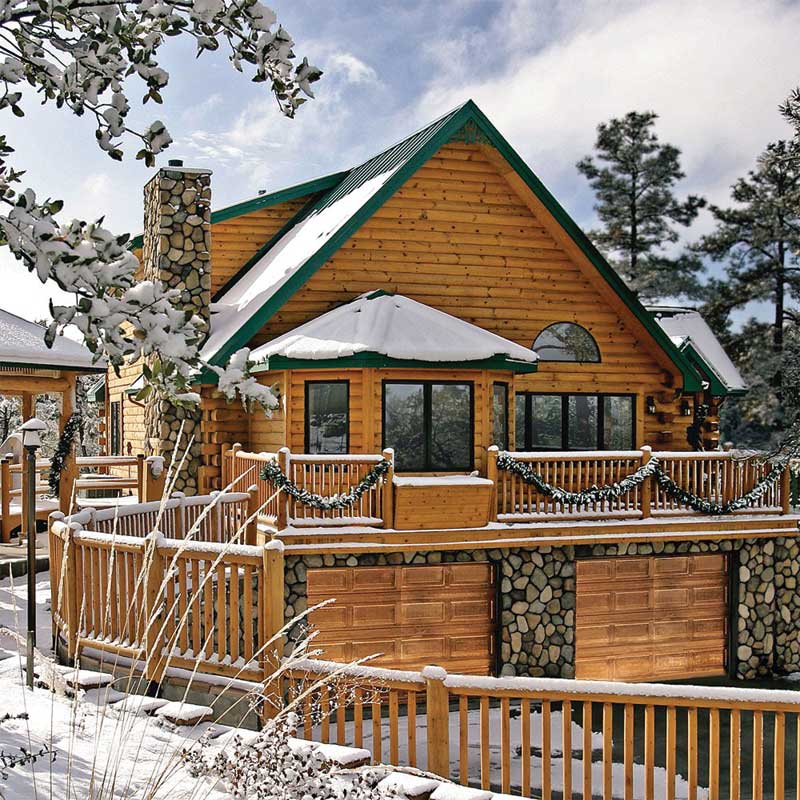
[2]Photos courtesy Cultured Stone by Boral
Moisture protection and water management is crucial
If not rain, structures will be exposed to melting snow or ice. Water can be relentless in its attempt to infiltrate the system one way or another. To maximize durability, the AMSV installation must include a means for proper drainage. If water intrudes behind a veneer due to voids associated with improper installation or damaged materials, it can lead to mold, rot, and mortar deterioration. Of particular concern is water penetration occurring during colder months, when more extensive damage is possible due to the expansion and contraction of the freeze-thaw cycle. This can damage mortar and—if deterioration progresses—result in AMSV bond failure, spalling, or other negative effects.
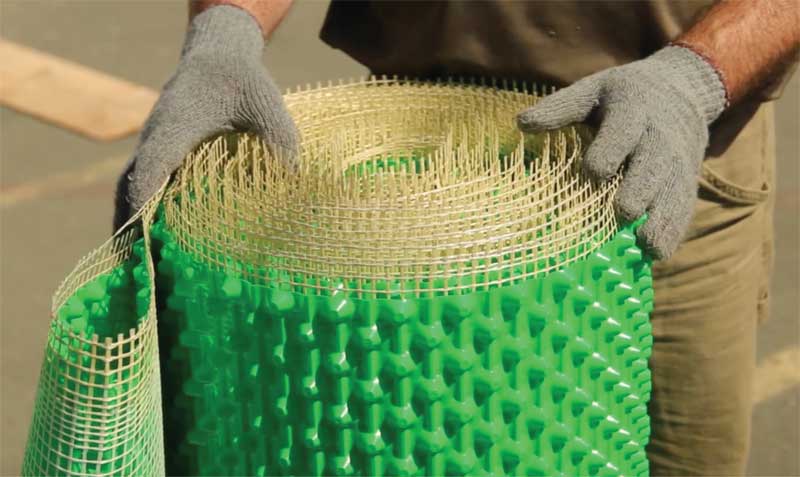
The weather-resistive barrier (WRB) is the primary line of defense for providing adequate protection of susceptible building materials. This layer, part of a concealed barrier system, is often the drainage plane. There are several types of WRB systems available, and building designers can select one that best fits the building climate. (Selecting a proper WRB for airtightness and water drainage is up to the discretion of the building owner and contractor’s knowledge of available products. By comparing performance properties, one can select a moisture vapor perm rating that fits the climate and building. It is advised to research the available options and look for a solution that can pass moisture vapor without requiring physical perforation of the material.)
A second layer of WRB, called the sacrificial layer, is added to keep mortar off the primary layer and create a small drainage path. This layer can be the same material or even product as the primary, but it does not have to be as robust at drainage, since it is sacrificial. The key is having a drainage plane between the sacrificial and primary layers to allow for drainage and keep the primary layer from being soaked. This double-barrier method helps protect against incidental moisture from a failed flashing or water management defect, enabling it to drain and exit the bottom to help provide a healthy, dry wall system.
 [3]
[3]A weep screed should also be installed at the foundation termination, between foundation and framing, to allow moisture that might accumulate behind the AMSV to escape. In most cases, the weep screed provides a 101-mm (4-in.) clearance from grade or a 51-mm (2-in.) clearance from any paved surface.
Lath is also needed—if the framing in framed construction is the skeleton of the building, then lath is the skeleton of the adhered veneer system. Many choices are available when it comes to lath, from expanded metal and woven and welded wire to fiberglass. Since this component is so critical to the performance of the system, this is not a good place to cut corners in materials or installation. It is important to consider manufactured stone, mortar, and lath can weigh up to 11 kg per 0.1 m2 (25 lb/sf), and the lath and its attachment will carry this load to framing.
Also popular are rainscreen systems, which provide a larger physical air space between the WRB and the cladding. Such systems are made from several materials and layers, including WRB, lath, sheathing, and exterior cladding. The key is the large drainage plane (usually 6 mm [¼ in.]), which allows moisture to easily drain to the weep screed. With this technique, nearly unobstructed drainage and ventilation drying can be achieved.
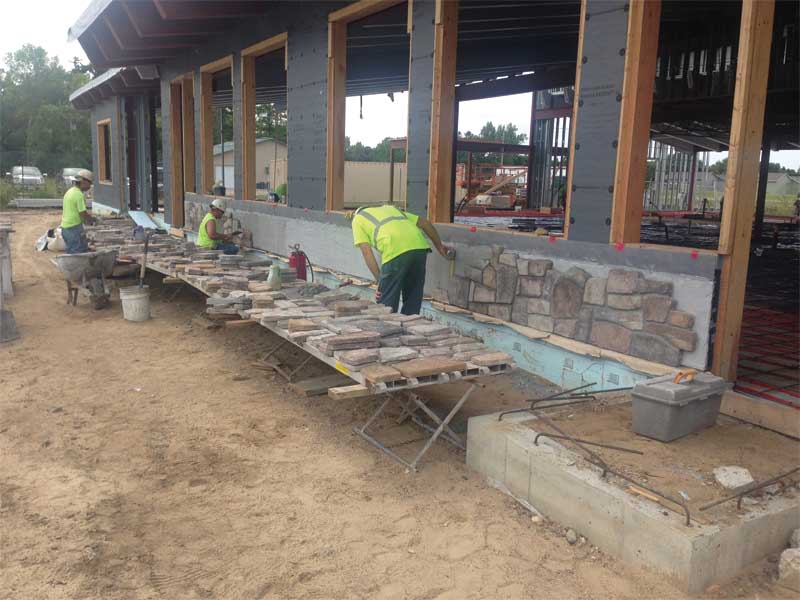
Installation conditions
To create an environment for a successful installation of AMSV, ambient temperatures—as well as the temperature of the substrate and all materials used at installation—must be considered. Accepted air temperatures for installation are between 4 and 32 C (40 and 90 F), with ideal conditions hovering at about room temperature.
When these conditions do not exist naturally, a temporary controlled work environment should be created to maintain the temperature. Failure to do so may result in a poor application and can lead to mortar and grout failure, especially in harsh climates with extensive rain, snow, and repeated freeze-thaw cycles. It is acceptable to install AMSV wet, but frozen AMSV or that with visible ice is not.
 [4]
[4]Mortar and grout
Choosing the right mortar and grout is important for any AMSV installation. During especially cold conditions, it becomes even more critical. Additives can improve mortar performance within these temperature ranges, but it is still critical to follow manufacturer instructions and verify additives will not negatively affect lath durability or cause efflorescence issues. All materials should be acclimated to the controlled temperature at least 24 hours before beginning work.
Also, curing time is slower during cold weather. With temperatures between 4 and 10 C (40 and 50 F), it can take 72 to 96 hours for mortar to set sufficiently. For a durable installation, grout should not be installed until mortar has set completely.
Mortar systems using modifiers in the mix are stronger and more deformable in cold-weather installations. Their high polymer content adds increased bond and flexural strength as well as offering more working time, making them an excellent option in climates where temperatures remain below freezing for several months. The requirements of such modified standard mortars are detailed in ANSI A118.15, American National Standard Specifications for Improved Modified Dry-set Cement Mortars, and A118.4, American National Standard Specifications for Modified Dry-set Cement Mortar.
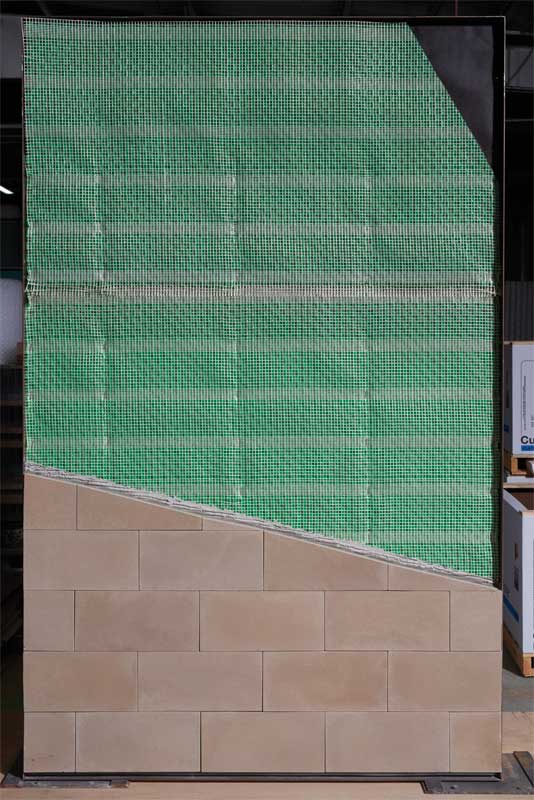
Eliminating voids
One of the best ways to weatherproof an AMSV installation is to ensure all mortar voids are eliminated during the installation process. There should be no areas between the wall and the AMSV where water might enter or collect.
A multistep process is employed, beginning with a scratch coat, which accomplishes two primary functions. First, by fully encapsulating the lath with a mortar scratch coat, the amount of water and air that can reach the lath is minimized. The mass of the total scratch coat combined with setting bed mortar and AMSV units provides the capability to manage water through absorption and evaporation. The scratch coat should be 13 to 19 mm (½ to ¾ in.) thick.
Next, the setting bed mortar is applied. The goal is to create a uniform layer of mortar to completely cover the scratch coat and bond stones to the system. A minimum of 345 kPa (50 psi) shear bond strength is required both in ICC-ES AC51 and ASTM C1670. The basis for this requirement is pulled from the Masonry Society (TMS) 402, Building Code Requirements and Specification for Masonry Structures, sections 12.1 and 12.3. This process helps eliminate voids within the mortar layers that could capture water. Captured water can freeze and cause units to de-bond and sometimes spall.
 [5]
[5]Minimizing saturation time
All cladding is exposed to water or snow at some point. AMSV, like other masonry products, is designed to stand up to normal precipitation and seasonal weather. However, for an installation that performs well in wet and freezing weather, minimizing saturation and providing adequate drainage are vital.
Kickout and other flashings
Kickout flashing is critical in the installation, as it keeps roof runoff rainwater from being directed at the wall. If kickout flashing is installed improperly (or not at all), the roof water force is such it can penetrate the cladding and enter the wall. (Further information is available through International Association of Certified Home Inspectors, at www.nachi.org/kick-out-flashing.htm[6].) In general, flashing should be used at any penetration, termination, or transitions of the wall.
Capping
Good water management principles govern the transitions between materials. Caps provide a protective sloped surface for different levels and indents along the exterior, and shelter the wall from harsh weather effects such as rain, snow, and ice. (More on coping is available via PaverSearch’s “About Wall Caps and Coping,” at www.paversearch.com/coping-caps-introduction.htm[7].) For example, if lap siding such as cedar or vinyl is used on the top half of an exterior wall with the bottom portion installed as AMSV, a cap and flashing should be installed that overhang the veneer installation by 38 to 51 mm (1 ½ to 2 in.) to divert water and minimize saturation. If possible, there should be a drip edge or drip kerf feature on the cap to force water to drop off promptly at the cap’s outer edge.
Moisture management
Rising damp can occur when AMSV is installed in contact with the ground. Moisture rises up through fine pores in masonry, including manufactured stone, in a wick-like fashion, known as capillary action. It is not uncommon for wicking water to rise as much as 1016 to 1270 mm (40 to 50 in.). Rising damp can result in crumbling mortar, efflorescence, and damage to AMSV, and if extensive, it can cause structural failures. (Learn more by consulting the article, “Rising Damp: How to Recognize It and What to Do” at dengarden.com/cleaning/Rising-Damp-Overview[8].) To prevent rising damp, a 101-mm (4-in.) clearance from grade and 51-mm (2-in.) clearance from paved surfaces should be maintained.
Water, snow, and repeated freeze-thaw cycles can all cause spalling, hairline cracks, and general deterioration of AMSV if the proper installation techniques are not followed. Running AMSV to or below grade invites failure—while it might make the installation look more realistic, this may affect warranty coverage and is a potential violation of the International Building Code (IBC), which has clearance requirements for adhered stone veneer under Section 1405.10. Clearance is required to allow drainage to occur, prevent moisture from wicking up the wall, minimize soil staining and efflorescence, and—in some areas—provide termite inspection zones.
Even when AMSV is installed properly above grade, standing water can wick into and behind the siding, causing extensive damage. Eliminating standing water—for instance, by sloping the grade away from exterior walls—prevents this type of moisture issue. Swales are also a simple way to direct water away from exterior walls, and underground drains in low-lying areas are effective in preventing water from accumulating near the foundation.
 [9]
[9]Maintenance considerations
Each AMSV manufacturer publishes specific care and maintenance requirements. Most have detailed instructions on sealing, cleaning, efflorescence, power washing, and de-icing chemicals. Installers should read these before proceeding, as they can drastically affect performance and warranty coverage. Sealing is not recommended for AMSV, as it can lead to problems such as water entrapment.
Commonly used to maintain walkways, rock salt and other de-icing chemicals are corrosive to all concrete and, over time, will break down any AMSV in contact with the applciation. (For more, read “Don’t Damage Your Natural Stone Walkways with Rock Salt” at www.mygreenimpressions.com/blog/dont-damage-your-natural-stone-walkways-with-rock-salt[10].) They also degrade mortar and can cause discoloration. Special care must be taken to ensure de-icing chemicals are not used so generously they contact the AMSV. Immediate repairs should be made to any degrading mortar or grout.
Harsh cleaning, whether with chemicals or power washing, must also be properly managed. Gently cleaning stones with a soft brush using liquid detergent and water should suffice. Employing bleach or other harmful chemicals should be avoided for the protection of the stone product. Manufacturer instructions should be supplied to ensure proper maintenance techniques are followed to prevent avoidable damage.
Conclusion
When it comes to manufactured stone products, several options are available. From contemporary styles to traditional façades, there is a wide variety of high-performance AMSV products. With a number of available textures and colors, AMSV creates stylish, unique siding options without the cost of natural stone. It is also a dependable option for durable exteriors in virtually any climate, making it ideal for new construction or retrofits.
Observing proper techniques for cold-weather installation helps enhance the durability and the longevity of AMSV throughout the entirety of the year, protecting the system no matter the season. Taking proper steps to ensure the siding will dry quickly and the installation is free of voids is the best way to plan for even the harshest winter weather.
Chris Hines is the technical leader at Cultured Stone. With 25 years of experience in the building and construction materials industry, he has supported a range of services and products, including those relating to insulation, roofing, housewrap and flashing, windows, fencing, decking, and railing. Over the last 14 years of his career, Hines has specialized in various aspects of the manufactured stone business. He can be reached via e-mail at chris.hines@boral.com[11].
- [Image]: https://www.constructionspecifier.com/wp-content/uploads/2017/11/IMG_0239-winter.jpg
- [Image]: https://www.constructionspecifier.com/wp-content/uploads/2017/11/Figure-4-winter.jpg
- [Image]: https://www.constructionspecifier.com/wp-content/uploads/2017/11/Figure-3-wiinter.jpg
- [Image]: https://www.constructionspecifier.com/wp-content/uploads/2017/11/Figure-6-winter.jpg
- [Image]: https://www.constructionspecifier.com/wp-content/uploads/2017/11/Figure-5-winter.jpg
- www.nachi.org/kick-out-flashing.htm: http://www.nachi.org/kick-out-flashing.htm
- www.paversearch.com/coping-caps-introduction.htm: http://www.paversearch.com/coping-caps-introduction.htm
- dengarden.com/cleaning/Rising-Damp-Overview: http://dengarden.com/cleaning/Rising-Damp-Overview
- [Image]: https://www.constructionspecifier.com/wp-content/uploads/2017/11/Figure-2-winter.jpg
- www.mygreenimpressions.com/blog/dont-damage-your-natural-stone-walkways-with-rock-salt: http://www.mygreenimpressions.com/blog/dont-damage-your-natural-stone-walkways-with-rock-salt
- chris.hines@boral.com: mailto:chris.hines@boral.com
Source URL: https://www.constructionspecifier.com/adhered-manufactured-stone-veneer-manufacturing-performance-winter/