Adjacent precast box beam bridges

The first beam was cast on May 7, 2014. The following day, the prestressed strands were cut and the box beam was lifted from the form and loaded onto a truck. While the beam was on the truck, power-washing with water was used to obtain the exposed aggregate surface in the shear key. The beam was then moved to the yard for curing. The same procedure was used for the remaining beams.
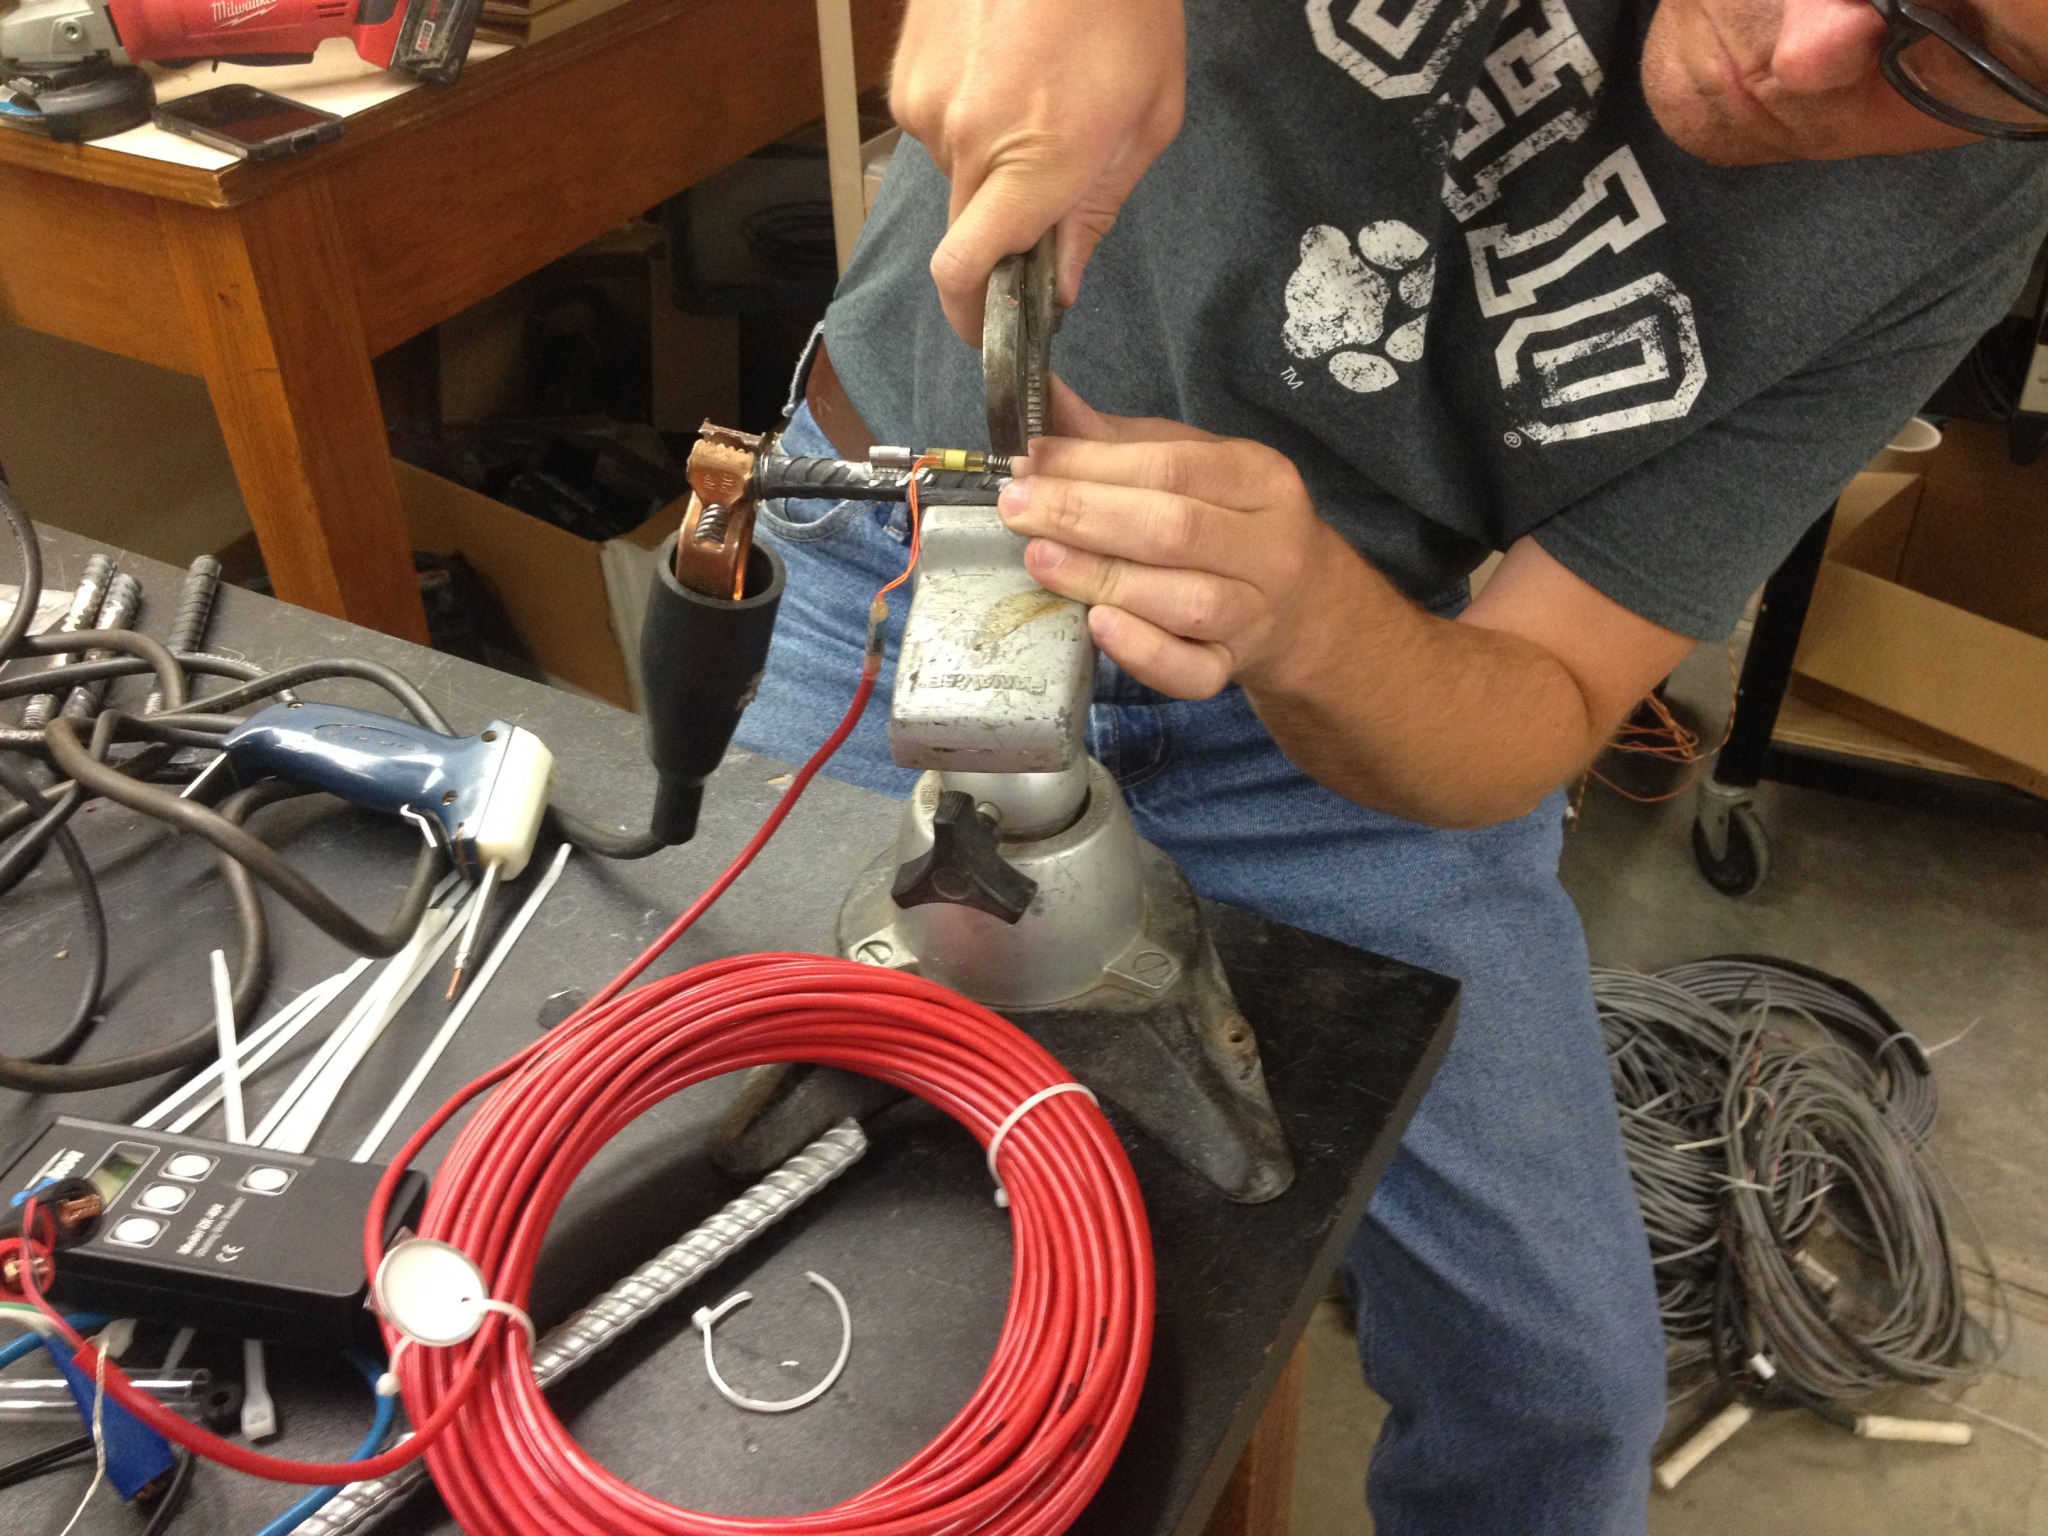
One May 28, the contractor began to remove the old bridge and the new bridge’s foundations and abutments were constructed. On July 12, the box beams were transported to the site. Six vibrating wire strain gages were installed on six dowel bar inserts (male threaded end).
Each dowel bar was instrumented with one VW4150 gage at distance of 38 mm (1 1⁄2 in.) from threaded end (Figure 11). While the beam was on the truck, the dowel bars were screwed into the embedded part of the dowel bar assembly. Instrumented dowel bars were installed to the left side of cross section of Beams 2, 3, and 4. Two instrumented dowel bars were used in each beam, one at the quarter span and one at mid-span (Figure 12).
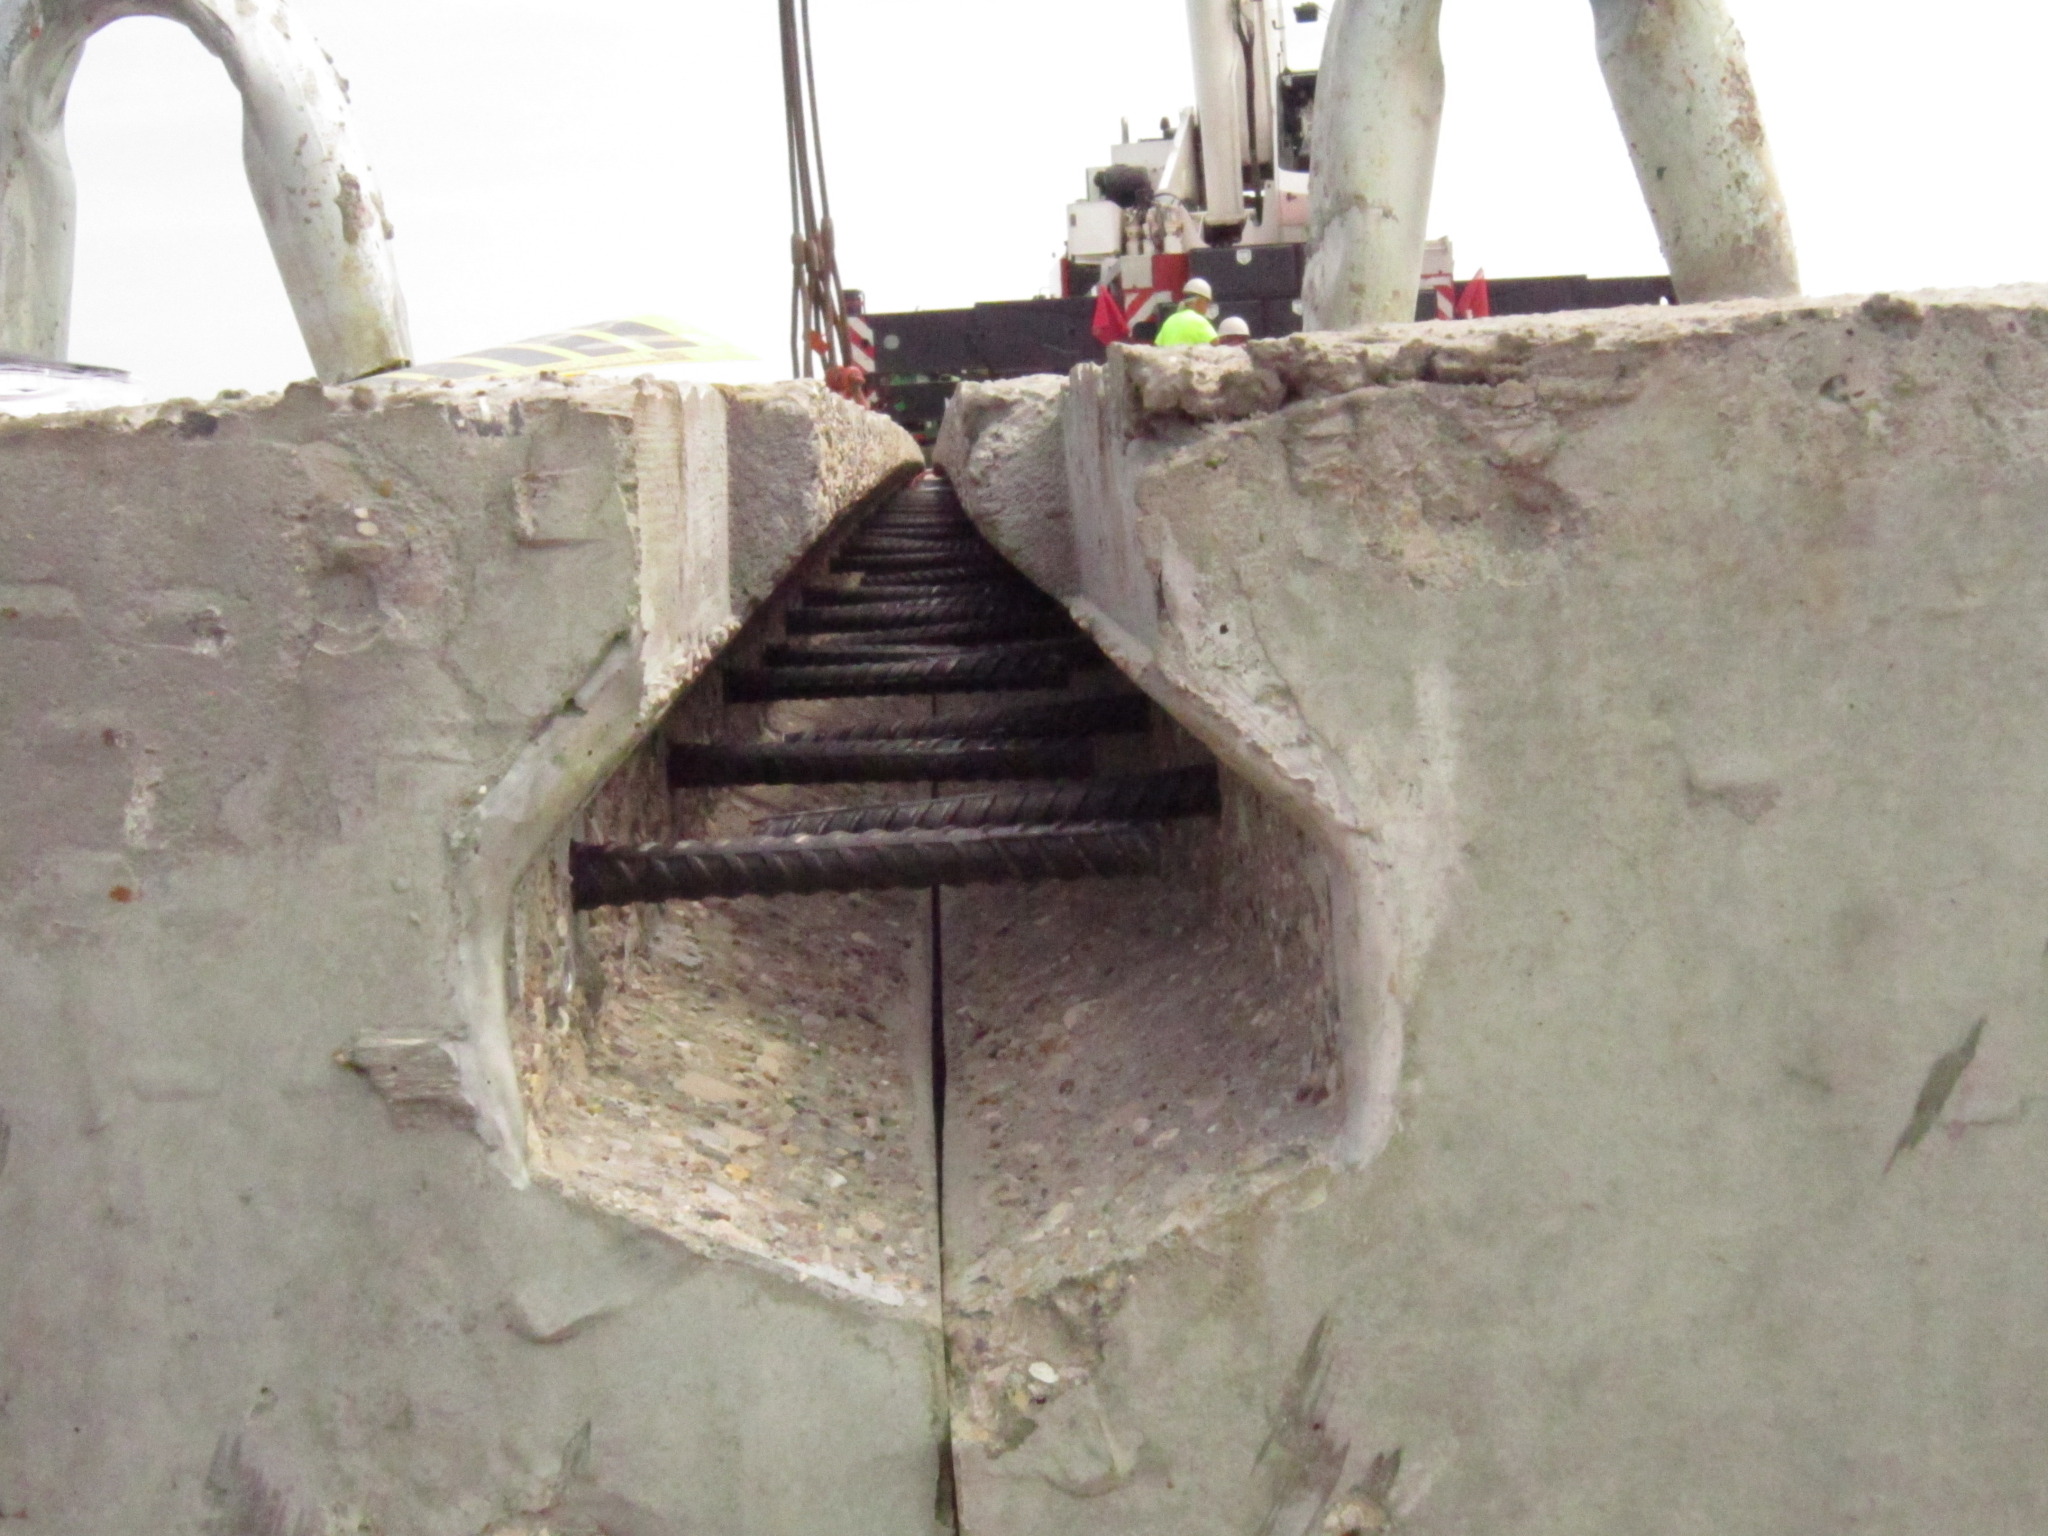
The beams were then moved from the truck and set on the abutments using a crane. Each end of each beam rested on bearing pads on the abutments. Additionally, one positioning vertical dowel bar at each end of each beam was placed through the beam into the abutment. The forward abutment vertical dowel bars allowed for expansion by using a joint sealer around the dowels. The rear abutment vertical dowel bars were grouted into place to create a fixed condition. Figure 13 provides a view of the shear key with dowels after the beam placement has taken place.
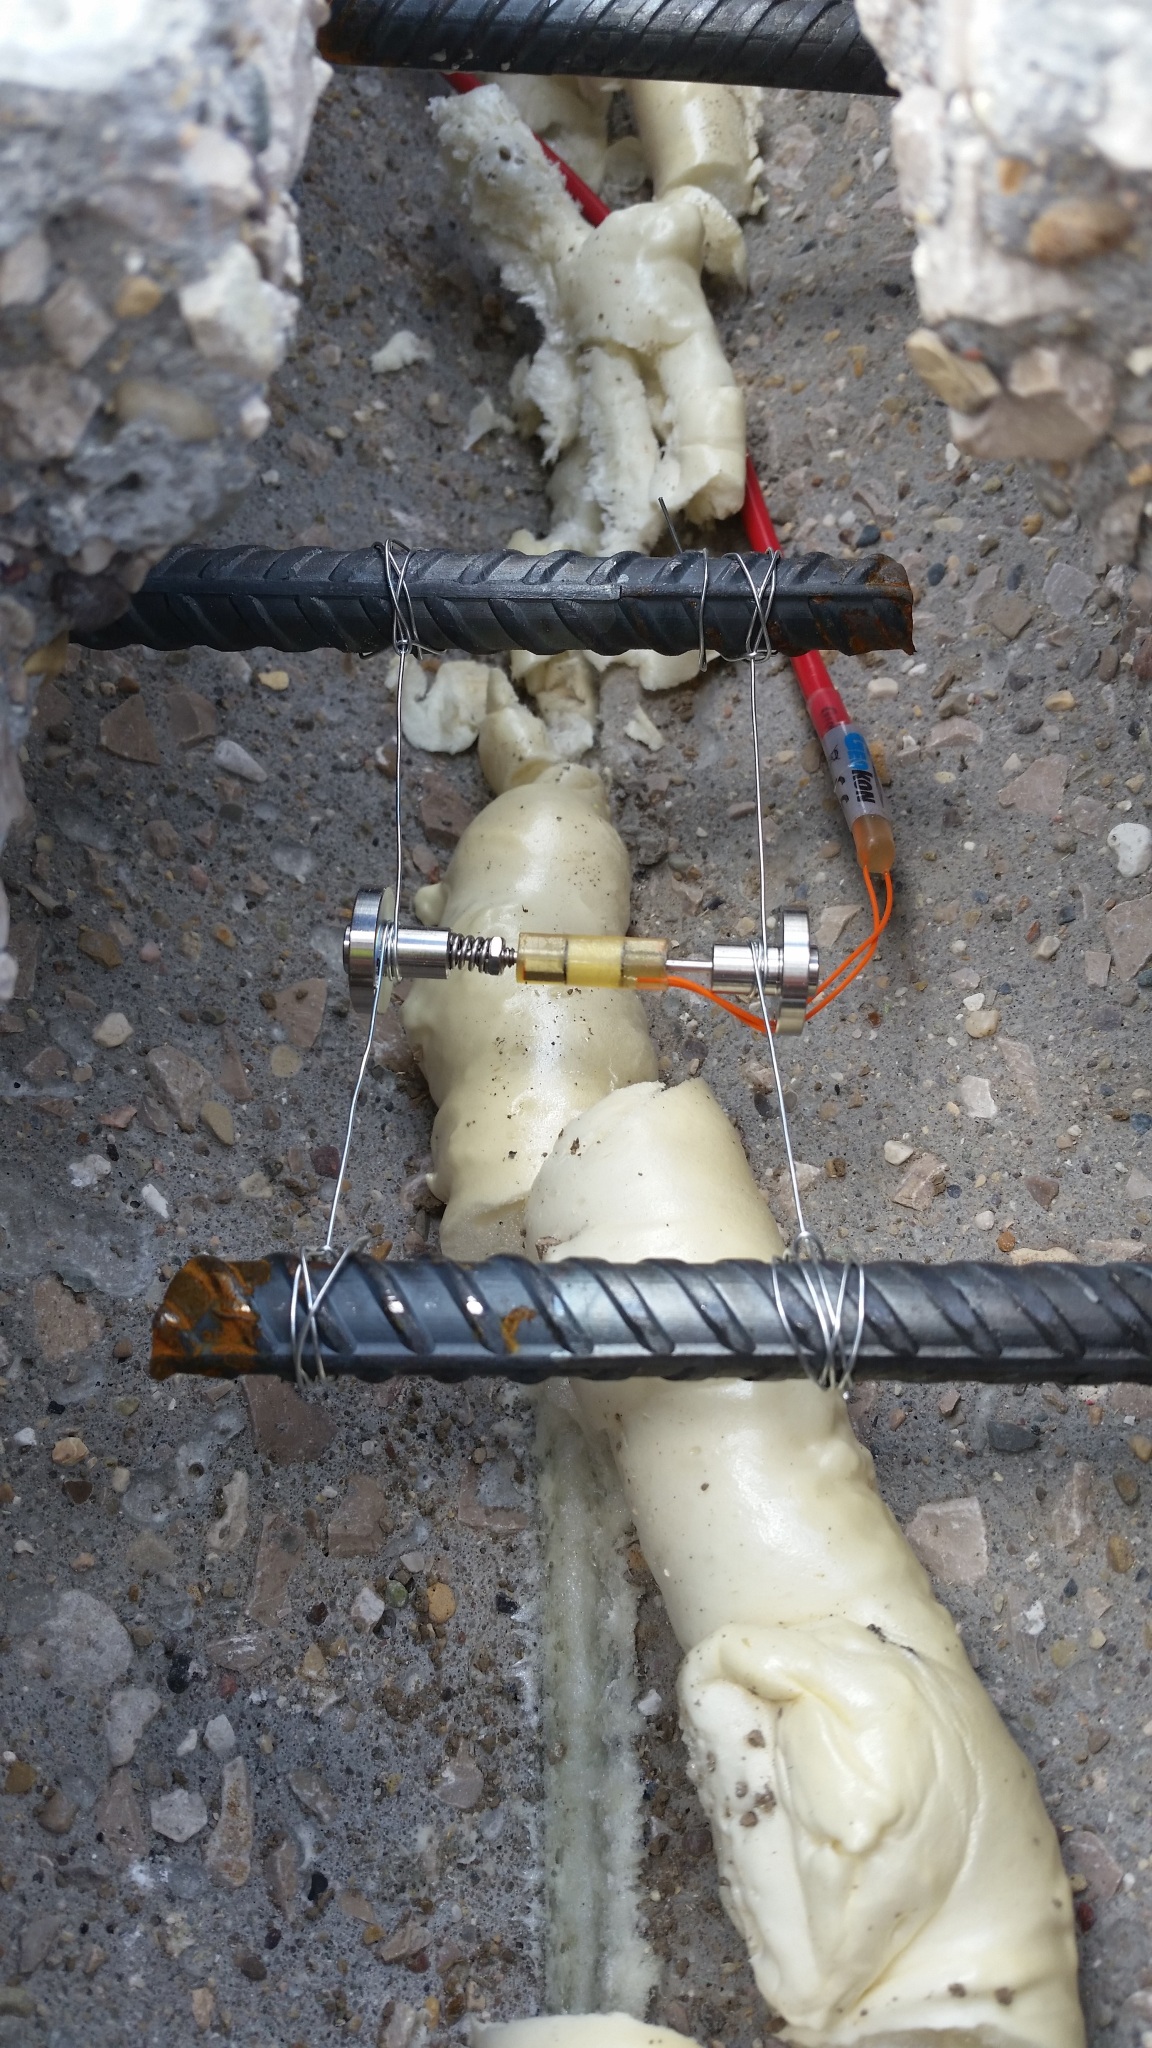
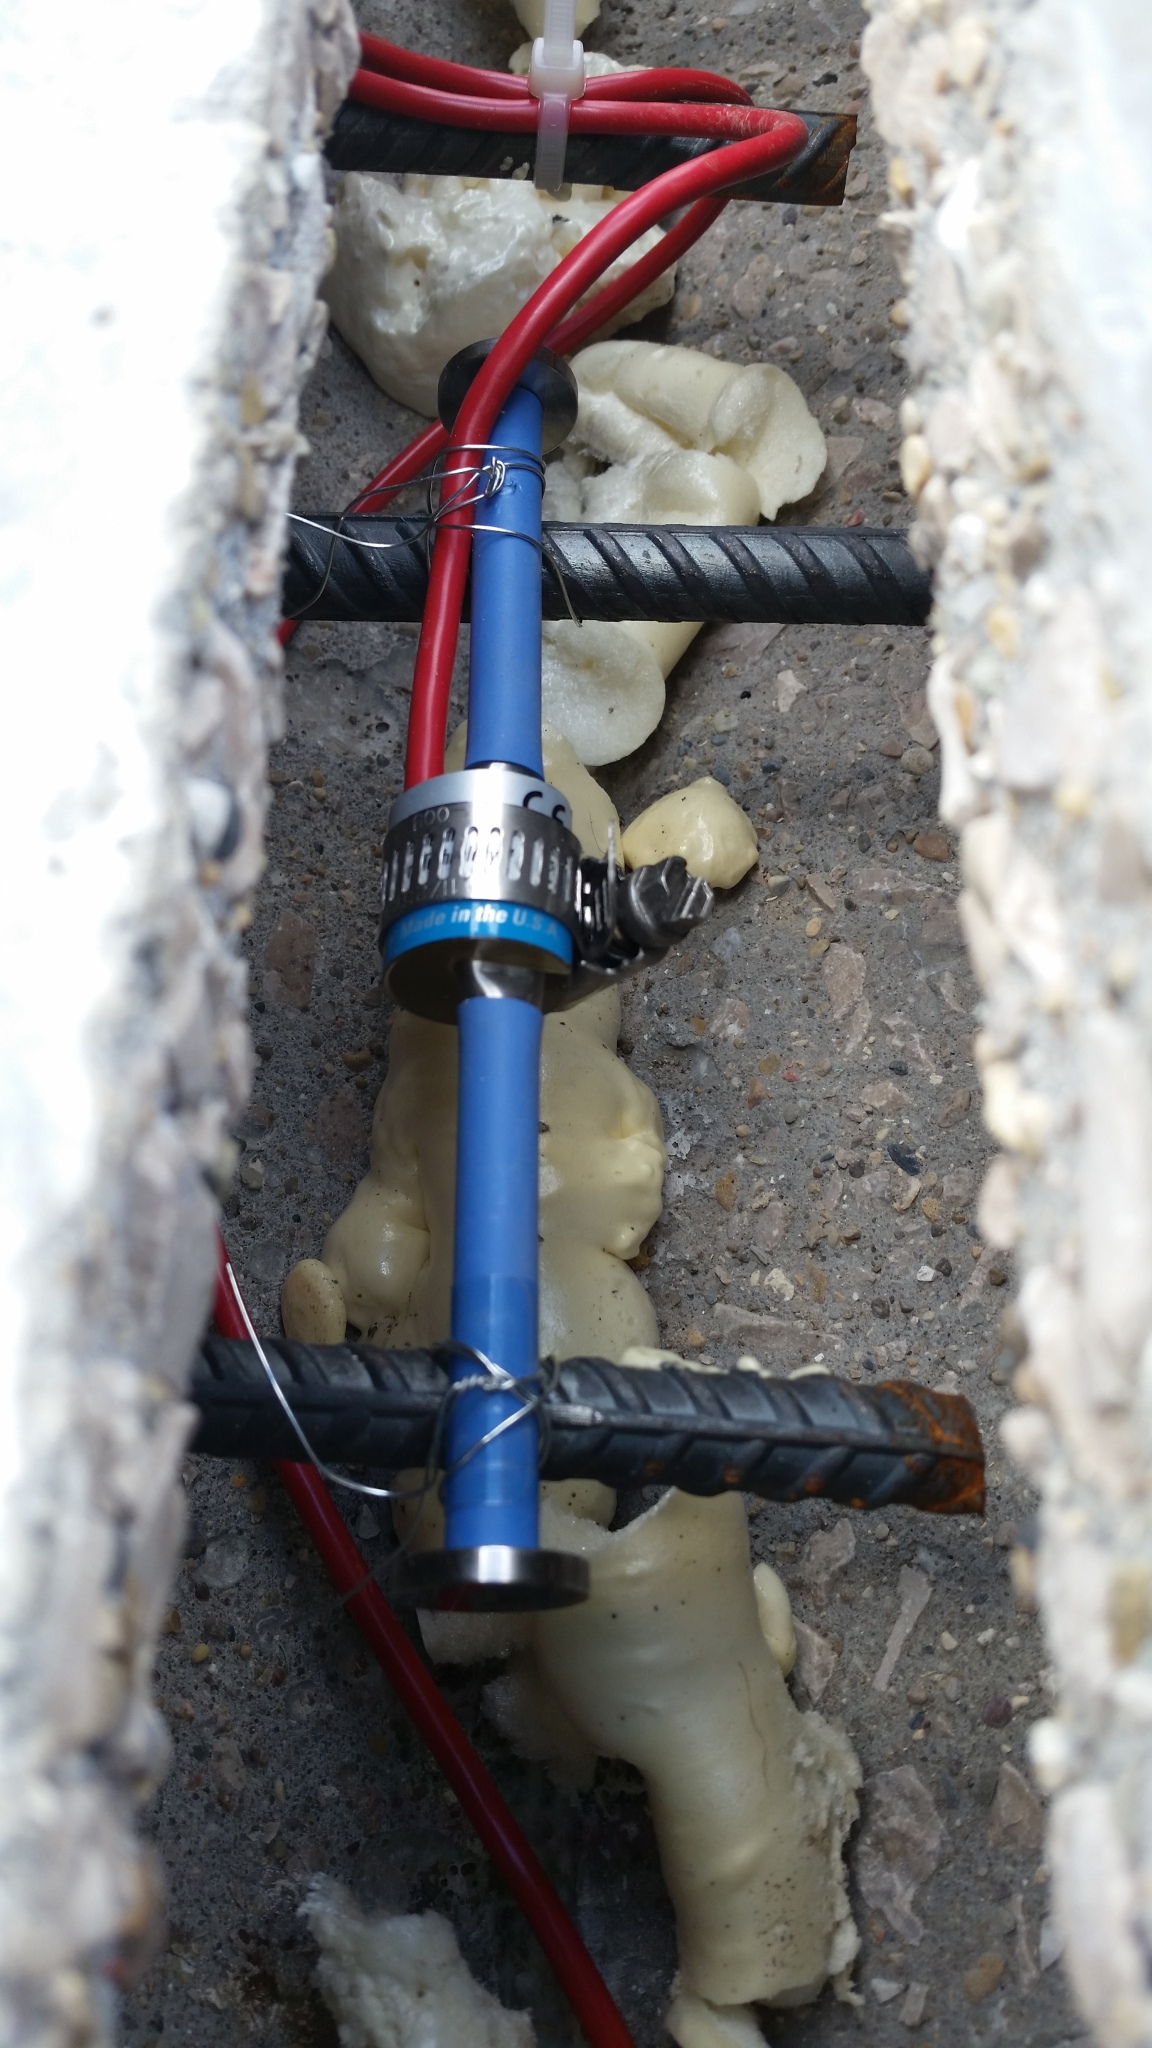
On July 16, the three shear keys between Beams 1 through 4 were instrument with vibrating wire strain gages. Six vibrating wire strain gages, VW 4202, were placed in the transverse direction because these gages had a short length that allowed them to fit transversely in the shear key (Figure 14). Each shear key was instrumented with one transverse gage at the quarter span and one transverse strain gage at mid-span. Four vibrating wire strain gages, VW4200, were used in the longitudinal direction (Figure 15). Shear Keys 1 and 3 were instrumented with one gage at the quarter span and one gage at mid-span.
After installation, the excess expandable filler material between beams was removed and the joints were covered with plywood, except for larger openings at the quarter points along the shear key.
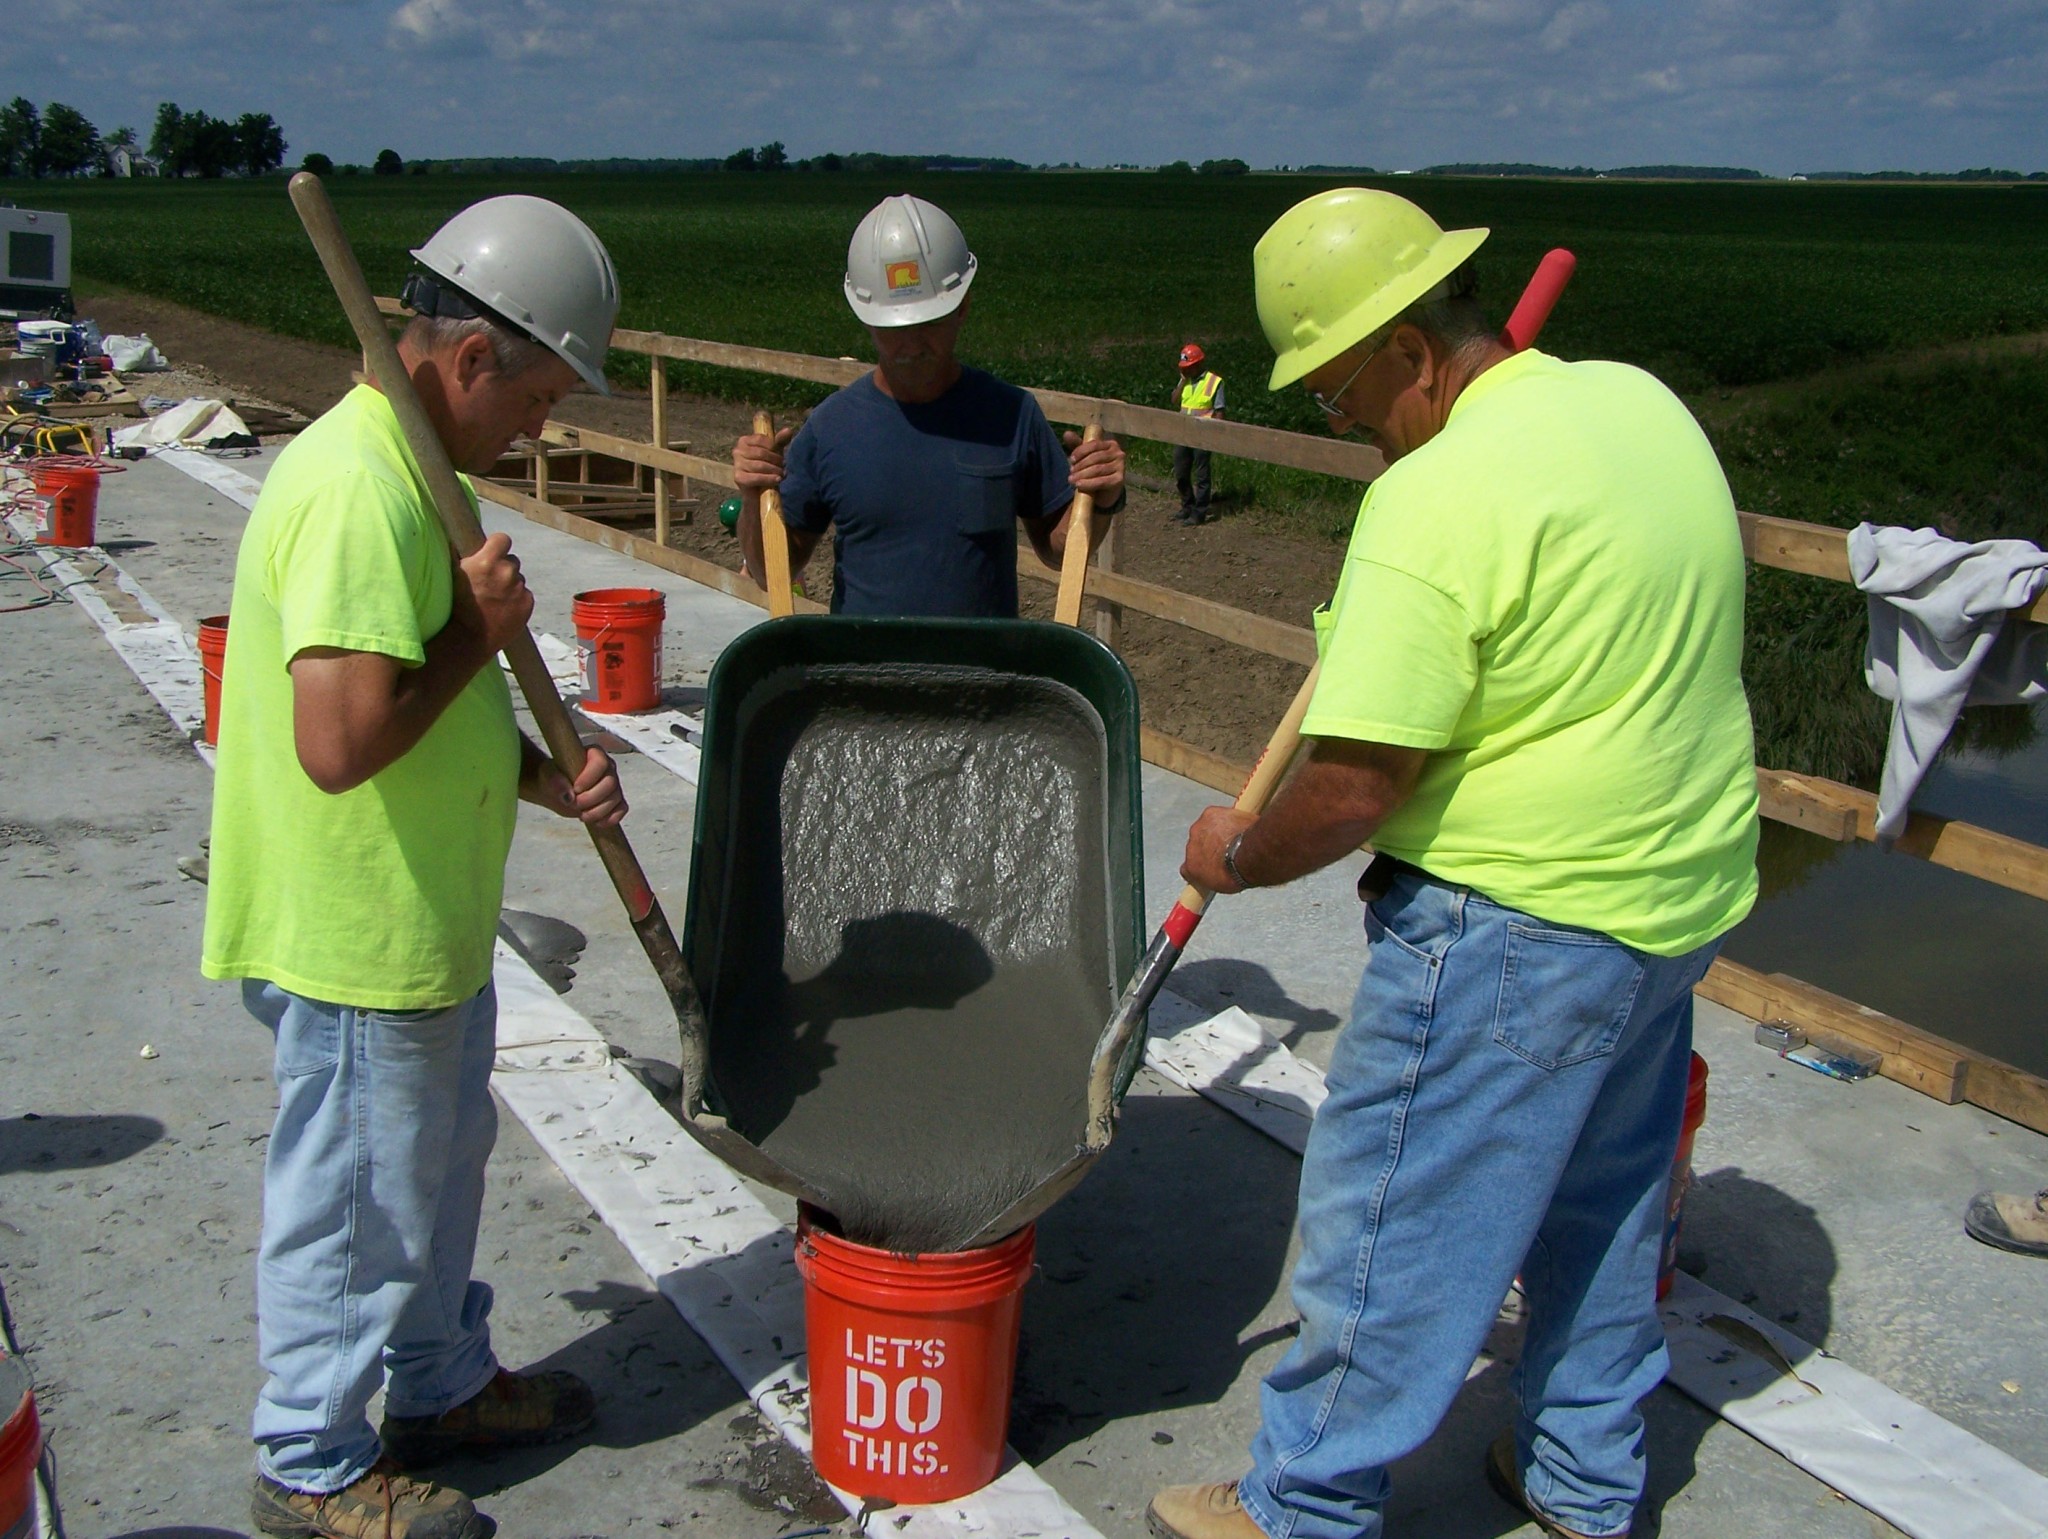
On July 17, the shear key joints were cast using UHPC. Two mixers were used to properly mix the material before it was moved to the joints in wheelbarrows and placed into chimneys made of plastic buckets located at the larger joint openings (Figure 16). The UHPC flowed into the joints, and the filling of the joints was ensured by the hydraulic head in the chimneys. Instrumentation was connected to data-acquisition systems to monitor the bridge as the UHPC cured.
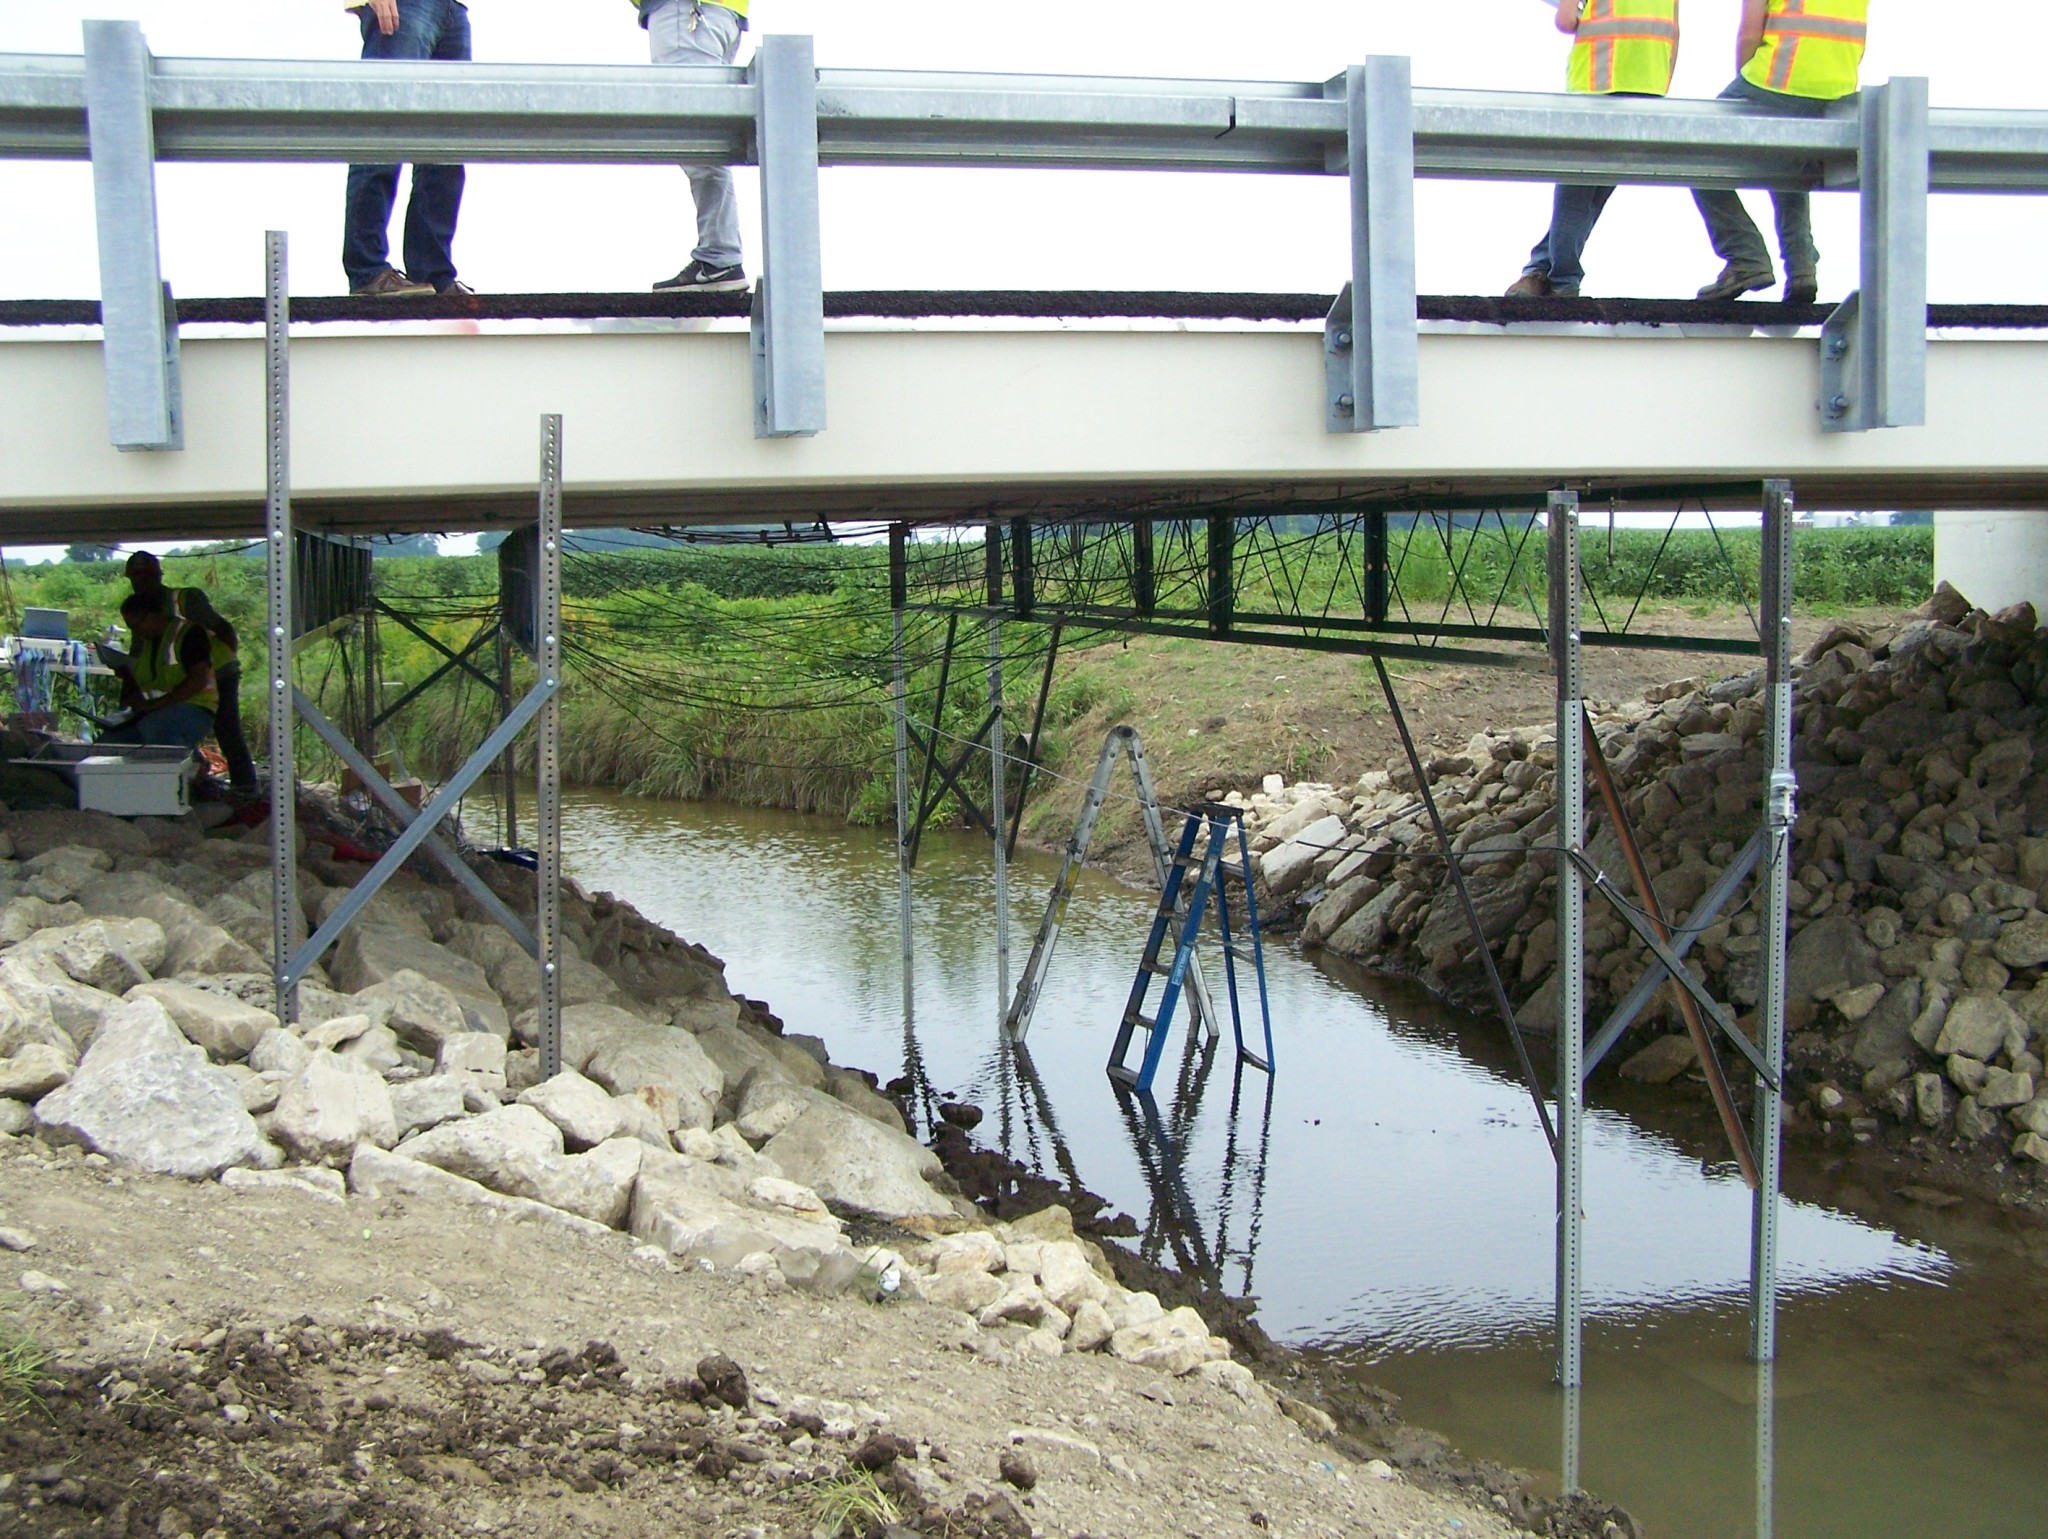
On July 22, the plywood forms were removed from the joints. No cracks were observed from inspection of the shear keys. On July 24, a waterproofing membrane was installed atop the bridge as work continued on the approaches. The bridge was paved with an asphalt wearing surface on August 5. The following day, frames were set up underneath the bridge at the quarter-span and mid-span (Figure 17).
Sign up for our weekly newsletter
Architectural materials and methods delivered right to your inbox
- CSI News and Notes: CSI Foundation’s construction camp; CSI spring exam; and more
- CSI News and Notes: CSI’s credentials; CSI conference theme; and more
- To be specific – CSI supports young AECO professionals
- CSI News and Notes: CSI’s foundation scholarships, national conference, and Crosswalk
- CSI News and Notes: AI’s impact; CSI 2024 conference, and more
Read the Latest Issue