Defining and testing construction tape and flashing durability
Why test tapes?
Experience in forensic investigations indicates tapes are prone to failure, which can be discovered due to water infiltration or the consequential structural damage. Tapes require careful installation, but manufacturers’ requirements vary, including rolling with a hand tool, limited effective temperature ranges, use of primers, treating the tape edges with sealant, or other specific procedures. Despite these requirements, tapes are often installed by untrained laborers that have never read the installation instructions or product information.
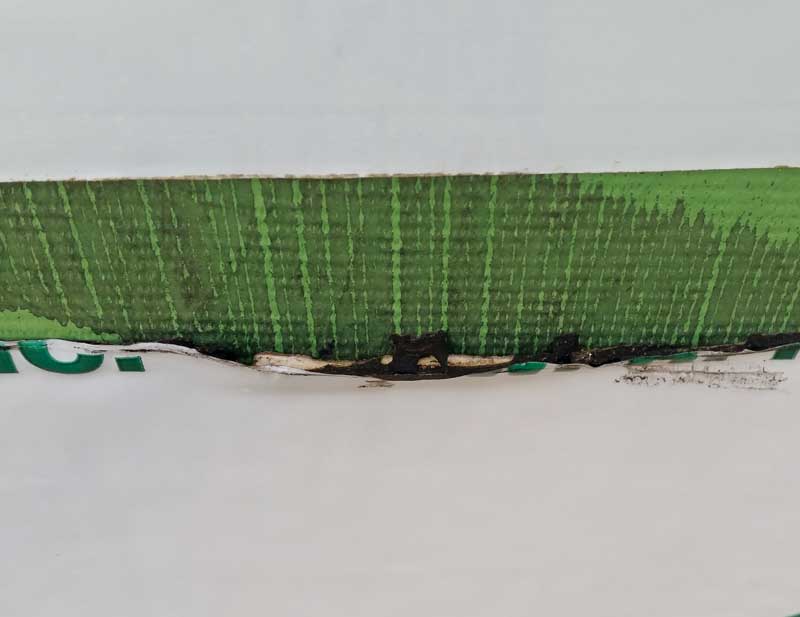
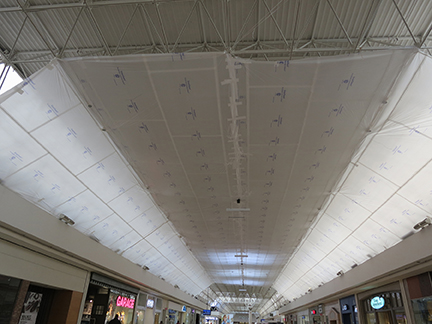
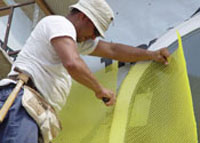
Tapes must adhere to a variety of substrates, which may be dusty or wet due to construction activities. The tapes must remain uncovered until the building is clad, exposing their free edges to abrasion, ultraviolet (UV) light, and weathering—harsh conditions that may cause curling, wrinkles, ‘fishmouths’ (Figure 1), or other failures.
Additionally, it is common to see one manufacturer’s tape used to flash an opening by adhering to another manufacturer’s WRB. Although not an approved assembly, tapes must often stick to products other than the manufacturer’s own. Incompatibility between tapes and substrates may cause leaks at the openings, penetrations, or, worse, at concealed locations within walls. Repairs are not trivial, since the products are concealed by cladding, requiring costly demolition and reinstallation. The WRB, including tape accessory products, must last for the design life of the building.
Due to the importance of tapes in building envelopes, specifiers must have confidence in their performance under a variety of circumstances. Manufacturers’ product information is often incomplete, offering only general information—actual conditions may not meet the requirements provided by manufacturers.
How to test tapes
A variety of test methods and requirements published by ASTM and the Air Barrier Association of America (ABAA) were considered for this research. It would be ideal to test tapes’ ability to perform a variety of functions, including:
- accommodate movement;
- span joints and gaps;
- provide a seal to both air and water;
- adhere to a variety of substrates;
- remain durable in adverse conditions; and
- install with ease.
It is extremely difficult to include all possible variables in a single test, so an initial procedure was developed to look at the performance of construction tapes in a multi-faceted way.
The pull-off adhesion test, often called the ‘puck test,’ is often used in-situ to test membranes, including tapes. A pull-off adhesion of 110.3 kPa (16 psi) is required by AABA, but pull-off adhesion (i.e. tension) may not reflect actual behavior in construction, where tapes usually have to resist movement in plane. (For more information, see Revision 14 [June 2015] of the Air Barrier Association of America’s “ABAA Process for Approval of Air Barrier Materials, Accessories and Assemblies.”)
By analogy, consider separating an Oreo—it is most difficult to pull the cookies off the frosting in straight tension (and the cookies usually break). Instead, it is easier to pull cookies apart by twisting (i.e. torsion, which does not relate to typical construction) or by sliding (i.e. shear, as in ASTM D3654, Standard Test for Shear Adhesion of Pressure Sensitive Tapes). (The authors are grateful for the suggestion of this analogy by Dr. Christopher C. White, a research chemist with the National Institute of Standards and Technology [NIST].) These different directions of force application yield drastically different strength values. However, they are measuring the same adhesive property, so higher values from direct tension may give a false sense of security—and misleading information about durability. The authors believe shear adhesion is the appropriate way to measure the adhesive strength of construction tapes.
The selected initial test method is based on the ASTM D3654 procedure for measuring adhesion in shear, and was modified based on experience to include:
- outdoor exposure facing solar south to be subjected to high solar radiation (in addition to wind and rain); and
- a larger contact area than specified, to allow for less specimen modification with a consistent tape width. (The increased contact area also lengthened the time to failure, which prevents most tapes from immediately failing before meaningful results could be obtained.)
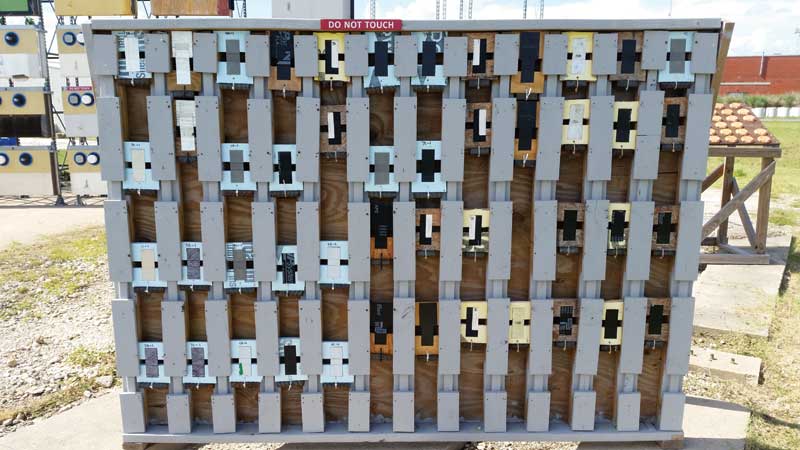
Numerous tapes made with different types of adhesive were tested on a variety of substrates. The rack can hold 48 specimens to be tested at a time, allowing for data collection on a large number of combinations. Other variables tested included using or omitting recommended primers, using mechanical rollers
or hand pressure, and varying the ‘rest’ time before exposure. Since pressure-sensitive adhesives often take time to develop full strength, researchers wanted to determine if these variables affected tape performance.
The test procedure is summarized as follows:
- Select tape and substrate combinations; make a minimum of three replicates for every combination.
- For each specimen, cut two pieces of the selected substrate to fit within the test apparatus, 76 mm (3 in.) tall by 127 mm (5 in.) wide.
- Apply primer to the substrate (if required, per the tape manufacturer’s product literature).
- Carefully unroll a strip of tape, ensuring the adhesive is not compromised with dirt, moisture, or other contaminants. Cut the strip with a razor blade to measure 127 mm long by 50 mm (2 in.) wide.
- Install tape with 258-mm2 (4-si) contact area, with 50 mm (2 in.) of length on each substrate piece.
- Apply pressure to the tape with an appropriate roller to promote optimal adhesion.
- Allow the specimen to rest indoors before installing on the rack outdoors; store the specimens. Rest periods ranged from 24 to 72 hours.
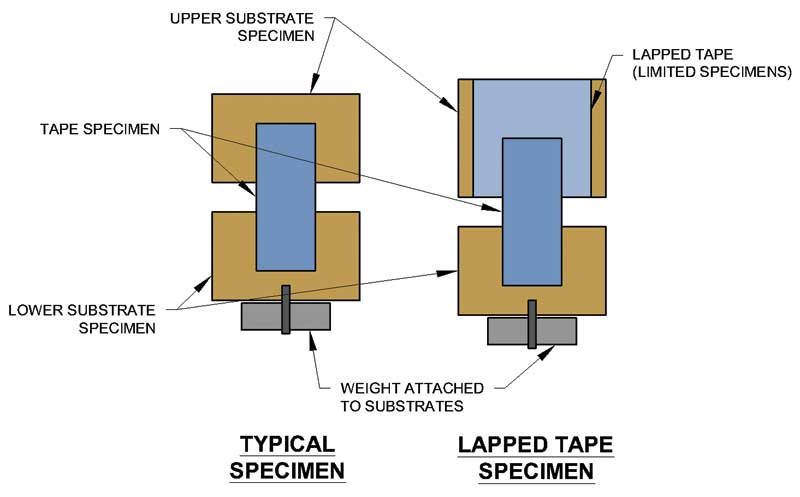
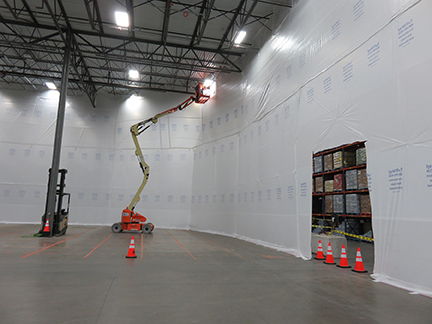
- Attach a weight to the lower substrate piece to reach a combined mass of 0.45 kg (1 lb) for the substrate, tape, and weight. The final configuration is shown in Figure 2.
- Install specimen on the test rack (Figure 3); record the date and time of exposure.
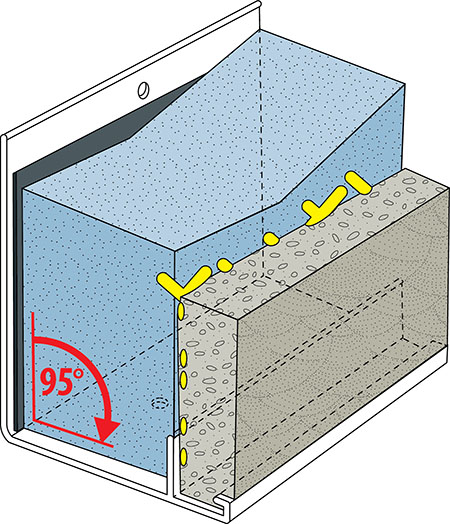
- Record the date and time of failure (when tape disbonds from substrate). If failure does not occur after 30 days, remove the specimen and record the date and time (Figure 4).
Sign up for our weekly newsletter
Architectural materials and methods delivered right to your inbox
- CSI News and Notes: CSI Foundation’s construction camp; CSI spring exam; and more
- CSI News and Notes: CSI’s credentials; CSI conference theme; and more
- To be specific – CSI supports young AECO professionals
- CSI News and Notes: CSI’s foundation scholarships, national conference, and Crosswalk
- CSI News and Notes: AI’s impact; CSI 2024 conference, and more
Products

Read the Latest Issue