Inspections, testing, and the diagnostic toolkit
by Catherine Howlett | December 1, 2012 10:51 am
 [1]
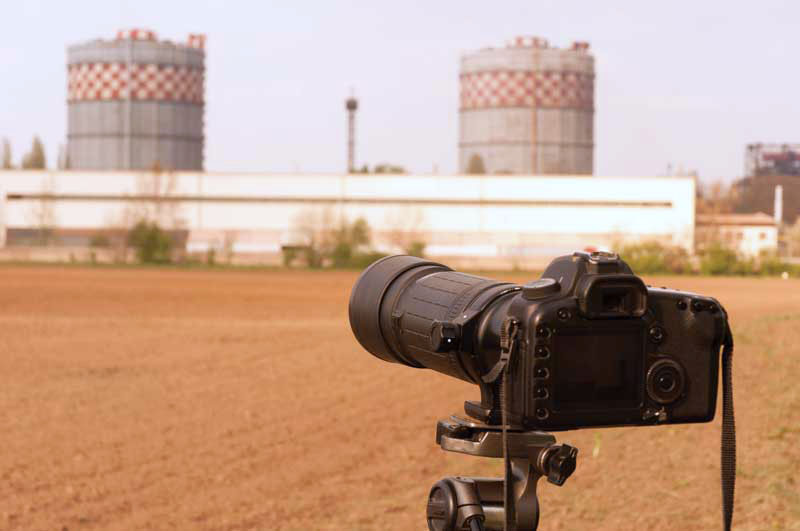
[1]This follow-up to a previous article on the importance of field verification, testing responsibilities, and reporting protocol describes some of the equipment and instruments this author frequently uses when visiting construction sites. (For the first part of this article, see the author’s “Trust, but Verify: Tools and Tricks for the Design Professional” in the February 2012 issue of The Construction Specifier[2].)
Testing can normally be divided into two categories—nondestructive (NDT), which does not harm or damage the entity or require its removal, and destructive (in which case the subject is altered or removed from the location and repair is later required). Regardless of which of these two paths is chosen, it is usually best that the test equipment is used and maintained by the same person. This ensures the equipment’s condition is always known after each use, and it is operated properly, with clear maintenance and calibration history.
Further, when the same person uses the equipment, he or she gains valuable experience and treats the devices in the same manner. When multiple individuals use the same equipment, accidents or neglect is more probable, and problems may not be communicated to others.
Some equipment does not require batteries, some equipment uses rechargeable ones, and others employ disposable. This author feels more comfortable with the latter because the charge seems to last longer. It is very easy to grab the needed spares as opposed to maintaining a whole wall of electrical outlets to accommodate the different rechargeable batteries and their rechargers.
Choose your weapons
When selecting test equipment, it is usually advantageous and more economical to avoid entry-level equipment. One should check capabilities and features and compare to ultimate needs. Initially, entry-level equipment may be easier to learn than advanced equipment, but these devices may quickly become inadequate and no longer meet needs. As experience is gained, there may be an impulse to upgrade equipment. Thus, it would be prudent to purchase one’s ‘second’ instrument first. Upgrading can be expensive and can leave a person with a drawer full of unused gadgets and black boxes.
 [3]
[3]Photos courtesy Cris Crissinger
The display is a vital part of the usefulness of the meter. Although a digital display can provide readings more precisely than a pointer, unless the screen is non-glare or has high contrasting readings and background (or is backlit), the information can be difficult to read, especially when viewed in bright light or at an angle. Some instruments have a lit background, but this usually offers little improvement. Usually, a needle display is much easier to read thana digital display under varying light conditions, but precision in reading may be sacrificed with a needle display.
The following list of diagnostic tools is neither all-inclusive nor overly detailed. Instead, it represents selected items from the author’s toolbox repertoire of useful equipment. When choosing tools, one should consider those with which he or she is familiar and complements his or her specialty. For instance, a structural engineer may not need a moisture meter or sound meter, but a metal scanner, dry film gauge, or inclinometer would be useful.
Infrared thermometer
This device measures surface temperature without contacting the surface. It should have a minimum distance ratio of 12:1 and a temperature range of –18 to 370 C (0 to 700 F), and be able to quickly determine whether asphalt is too hot or cold, if surfaces are too hot or cold to paint, or if surfaces are approaching dewpoint.
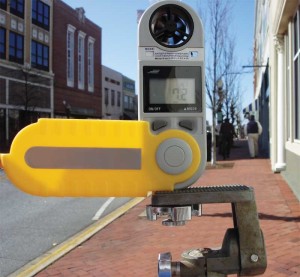
Air monitor
Air monitors show ambient temperature, relative humidity, dewpoint, and wind speed. They are used to determine suitable conditions for painting, interior casework installation, and other tasks. (Wind speed should also have an fpm scale to measure HVAC airflow.)
Sling psychrometer
The sling psychrometer tool very accurately measures ambient wet bulb and dry bulb temperature for conversion to relative humidity and dewpoints using integral scales.
 [4]
[4]for determining air movement.
Smoke stick
A simple and fast, but non-quantitative, way to detect the slightest air movement.
Moisture meter: pin-type
Determining moisture at or close to the substrate surface can be done with these devices. Since the meter produces two small pinholes (‘fang marks’), it is a destructive test. (Refer to this author’s two-part article, “Mysteries of Moisture Meters,” in the May and June 2006 issues of The Construction Specifier[2].)
Moisture meter: pinless
More versatile than the pin type, these devices can be used on different substrates such as cementitious and clay materials, drywall, wood, insulation, and various roof membranes. (For practical applications of various moisture meters, refer to this author’s articles, “Facing Floor Failures over Concrete,” and “Wood Flooring Woes: Considerations for Finishes and Substrates,” in the May and November 2010 issues of The Construction Specifier[2].)
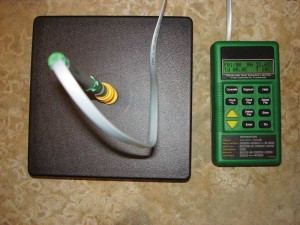
Moisture meter: concrete
These meters measure actual percent moisture and relative humidity in concrete. When the hood method is used to measure RH, it is a non-destruct test. If the test is conducted using probes set below the concrete surface, then the test is destructive.
RILEM tube
This device—bearing the French acronym for the International Union of Laboratories and Experts in Construction Materials, Systems, and Structures—evaluates masonry’s resistance to wind-driven rain and the effectiveness of sealers. Different tubes with applicable calibrations can be used on either CMUs and concrete. (For more, see this author’s article, “Measuring Masonry’s Moisture: Understand the role of the RILEM Tube Test,” in the November 2009 issue of Construction Canada[5].)
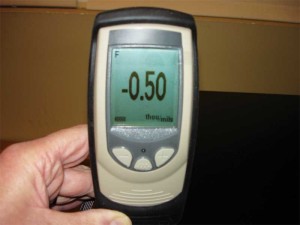
Dry-film gauge
This tool measures dried paint film. It should be able to measure paint thickness on ferrous and nonferrous metals ranging up to 99 mils (i.e. 2.5 mm) thick.
Wet-film gauge
This measures paint thickness in the wet state for comparison with the manufacturer’s recommended wet film thickness.
Tooke gauge
Using basic trigonometry, a calibrated scale, and a magnifier, this device identifies the number of coats of paint and the thickness and approximate color of each one. Works best on smooth and firm substrates. Since it cuts the paint film and top of substrate, it is a destructive test.
Pocket microscope
A pocket microscope (i.e. 30-power, with focus and integral light) can be useful for viewing close-up observations, such as paint finishes, surface preparation, corrosion, and hard-to-distinguish print.
 [6]
[6]Digital microscope
A 27-power digital microscope with a built-in camera (which takes JPEG photos and has a USB connection for easy downloading) is helpful for reviewing and recording close-up observations.
Binoculars
A good digital binocular—10 x 28 with central focus and an integral digital camera, integral light, removable memory card, date and time stamp, and LCD viewer—can aid in viewing and recording distant or difficult-to-reach locations, such as steep-sloped roofs, cornices, flashing, and windowsills.
Borescopes
A beneficial digital borescope will have removable wireless LCD screens with an 18-m (60-ft) range, integral light, and digital camera that takes JPEG photos or video.
Digital camera
Memories regarding detail can be short, and a photo can clarify uncertainty and simplify reports. At minimum, one needs a 3.0 zoom, 7 MP, date stamp, and a viewfinder. The viewfinder is a must because it is difficult to see a subject on an LCD screen in the bright sun.
Digital voice recorder
Recorders can reduce preparing reports to minimum typing, some editing, and organizing. It is important to opt for voice activation, with application to convert recordings to written text for word processing.
Metal scanner
These devices locate ferrous and nonferrous objects in cementitious substrates; the screen shows location and approximate depth of objects. Scanners are useful in finding reinforcing, metal studs, and piping.
Inclinometer
Inclinometers are useful for measuring slope in ramps, floors, and roofs. They should be at least 609 mm (24 in.) long, with an LCD screen to show slope in degrees, percent, and inches per foot.
Sound meter and field calibrator
Sound meters measure background noise and sound reduction of walls, doors, and windows. These devices should:
- comply with Class 1 or 2 of American National Standards Institute (ANSI) S1.4, American National Standard Specification for Sound Level Meters;
- possess an A and C scale;
- have slow and fast function;
- have high and low range (at least 30 to 130 dB);
- ave bandwidth of 31.5 to 8KHz;
- be accurate within 0.5 dB; and
- compute average readings.
A sound level calibrator by the same manufacturer is essential to perform field calibrations required by ANSI S12.60-2002, Acoustical Performance Criteria, Design Requirements, and Guidelines for Schools. Field calibrations are not a substitute for factory calibration.
 [7]
[7]Light meter
As their name suggests, light meters measure light at workstations, stairwells, and means of egress. Calibrated for imperial and metric (i.e. footcandles and lux), they should have settings for the type of light source—daylight/tungsten, sodium, mercury, fluorescent, or incandescent.
Glass analyzer
These devices measure ultraviolet (UV) transmission, visible light transmission (VLT), infrared, and solar heat gain coefficient (SHGC) to evaluate performance of glass systems.
pH tester
Primarily used to check the pH of cementitious materials before painting and for potential efflorescence, a pH tester can be quite invaluable to some professionals.
Pressure gauge
The pressure gauge is often used to check the opening force of doors to ensure compliance with the Americans with Disabilities Act (ADA). They tend to be calibrated in pounds per square foot.
Crack monitor
These devices determine the stability of cracks and fissures.
Rare earth magnets
Extremely powerful magnets, these round tools (16 to 19 mm [5/8 to 3/4 in.] in diameter) are used to locate ferrous fasteners in wood floors. (Refer to this author’s two-part article, “Mysteries of Moisture Meters,” in the May and June 2006 issues of The Construction Specifier[2].)
Sports floor and pile tester
Calibrated in inches and millimeters, these tools measure thickness of installed resilient athletic floorcovering and carpet pile.
Frame gauge
A frame gauge measures width, squareness, and plumb of door installations. Essentially, it picks up where the level leaves off.
Calipers
Calipers measure thickness of sheet goods such as metal and membrane, also doubling as a depth gauge. The minimum capacity should be 152 mm (6 in.).
Insulation depth gauge
This tool confirms thickness of insulation and fireproofing after installation.
Joint/seam probe
These probes check the presence of sealant in sheet metal joints and for openings in seams of roof membrane.
Roof core
Taking a core sample of an existing roof is an important and relatively simple procedure. It involves taking cores of the complete roof system to determine the components and construction. As it is clearly a destructive test, it should be performed by skilled roofing professionals with proper equipment and proper materials readily available to make repairs promptly. Some owners may become a little antsy if someone cuts a two-inch hole in their roof and may want to ensure the person cutting the hole has the equipment, materials, and experience to make proper repairs after the core is removed. Also, there may be some liability involved should leaks occur at the core location.
Thermal imaging
For years, thermography has been used successfully in the medical profession (e.g. ultrasound), but it is now becoming in vogue for the construction industry. Since prices range from approximately $1500 for an entry-level camera to well over $12,000 for advanced models, they are likely the most expensive—and complex—item in the toolbox.
Unlike most test instruments that provide an instant quantitative value or a specific location (e.g. 16.7 percent moisture content in the wood sills), the typical thermal imaging camera gives an image of the object highlighted in transitioning color shades of red, orange, yellow, green, and blue. Each hue represents a temperature that is displayed as a side bar on the thermal imaging display.
The primary use of thermal imaging is identifying thermal leaks in the building assembly. It identifies problem areas for further investigation and, since it can cover a large area at one time, it generates more information much faster. Contrary to common perceptions of thermal imaging, the technology does not provide a cause or a solution for problems. For instance, a thermal image can show heat escaping from a wall assembly. However, it takes further analysis to determine whether the problem is wet or missing insulation, leaking plumbing, openings in the wall assembly, inadequate or poorly performing materials, or poor construction. Other applications include locating ungrouted cells and delaminated concrete, but it will not reliably locate missing rebar.
Accurate and successful thermography requires a good understanding of the principles of heat transfer and, when used for construction, an understanding of construction assemblies and building science. Just as it takes an experienced radiologist to interpret X-rays, it takes a trained and experienced thermographer to interpret the pictures. Since the camera and certification represent a significant investment, careful thought regarding equipment and training should be made before making the plunge.
 [8]
[8]Site visits
Accessories to keep in the toolbox or vehicle that can simplify the site visit, reduce stress, and make the trip more enjoyable include:
- spare batteries;
- compass (for reference orientation);
- Ziploc bags in assorted sizes (for samples);
- medium-tip Sharpie pen for marking;
- soft brush to clean dust away from test area;
- spray bottle with distilled water to test for water repellency;
- wet wipes to clean hands before using equipment;
- hand soap to test or clean spots before testing; and
- padded protective cases with flaps and belt loops to hold individual pieces of test equipment for safe and easy transport and storage. (Individual cases can be attached to a separate belt for hands-free maneuvering. If the equipment did not come with a case, suitable ones are often available at photo equipment, electronic supply, or big-box stores.)
The field bag that holds these accessories is an important and personal choice for inspectors. This author prefers a heavy-duty canvas bag with a shoulder strap, open at the top, and lots of easily accessible pockets with flaps on the exterior, and open-top pockets on the interior, along with after-market Velcro straps to hold a roll of drawings or inclinometer. Assorted field bags are usually available at the big box building supply stores. A roomy easily accessible pocket to store fresh batteries is very helpful.
When heading to the site, one should try to anticipate equipment needs based on construction progress and the purpose of the visit to prevent return trips. However, lugging an entire tool chest around is not necessary. Tools that can be used almost any time (i.e. items to always keep in one’s vehicle) include:
- note pad;
- digital recorder;
- flashlight;
- digital camera;
- inclinometer;
- pinless moisture meter;
- infrared thermometer;
- weather meter;
- bore scope;
- microscope; and
- dry-film gauge.
Of course, electronic and battery-operated equipment should not be stored in direct sunlight or high temperatures as per the owner’s manuals—otherwise, very erratic readings are possible.
Conclusion
Regardless of who performs inspections and testing, they can play a vital role in building design and construction. The complexity of current building systems, the increased emphasis on building science, and schedule-driven projects can stretch the limits of building construction.
Armed with mental preparedness, an inquisitive nature, and a trusty toolbox, design professionals can play a vital role in assisting the contractor to deliver a building project that will exceed the owner’s expectations.
Joseph “Cris” Crissinger, CSI, CCS, CCCA, ASQ, has almost 30 years of experience preparing construction specifications. As director of corporate specifications with McMillan Pazdan Smith Architecture (Spartanburg, South Carolina), he is responsible for evaluating new products, maintaining corporate masters, preparing project specifications, assisting in facility assessments, performing field investigations, and coordinating internal training programs. Crissinger is a member of the Construction Specifications Institute (CSI), the Building Performance Committee of ASTM International, and the Design and Construction Division of the American Society for Quality (ASQ). He has twice won the Richard M. Horowitz Award from RCI Inc. for his writing. Crissinger can be contacted via e-mail at ccrissinger@mcmillanpazdansmith.com.
- [Image]: http://www.constructionspecifier.com/wp-content/uploads/2012/02/bigstock-Camera-Zooming-On-Liquid-Cooli-18259553.jpg
- The Construction Specifier: http://www.constructionspecifier.com
- [Image]: http://www.constructionspecifier.com/wp-content/uploads/2012/12/2.-Air-Monitor.jpg
- [Image]: http://www.constructionspecifier.com/wp-content/uploads/2012/12/4.-Smoke-Stick-e1455900185868.jpg
- Construction Canada: http://www.constructioncanada.net
- [Image]: http://www.constructionspecifier.com/wp-content/uploads/2012/12/7.-Moisture-Meter-Concrete.jpg
- [Image]: http://www.constructionspecifier.com/wp-content/uploads/2012/12/9.-Dry-Film-Gauge.jpg
- [Image]: http://www.constructionspecifier.com/wp-content/uploads/2012/02/27.-Frame-Gauge.jpg
Source URL: https://www.constructionspecifier.com/inspections-testing-and-the-diagnostic-toolkit/