Facility owners are considering factors beyond materials when deciding on a new roofing system—aspects such as energy costs, environmental issues, and restoration choices are all important. Each facility should be analyzed for myriad material choices, and need to be looked at with regard to structure type and use. The building’s geographic location (relative to cooling and heating degree days), surrounding buildings, wind, fire, maintenance, and insurance are a few of the basic items that should be considered when determining how to address an aging roof.
EPDM restoration
Restoring single-ply systems can be the most prudent option for a building owner. Its service should not be considered ‘over’ until the usable life of the roof is really finished—many single-ply systems are providing performance well beyond 20 years of age.
When considering restoration options, the membrane type must be taken into account. If a building owner originally selected an economical membrane such as a 1.14-mm (45-mil) sheet, then the restoration process may require a roof coating to extend the product’s life in addition to stripping in the seams and redoing the flashings.
Over the past several years, coating technology has significantly advanced to the point where they are considered a viable solution to an aged, but not failing, assembly. Many feature warranties covering the products’ reflectivity and performance, providing buildings and owners with years of protection and extended service life.
For buildings featuring a thicker, more premium membrane (e.g. 1.5-, 2-, or 2.3-mm [60-, 75-, or 90-mil] sheet), restoration procedures may only have to address the seams and flashings. Coatings can still enhance reflectivity, but in many instances they are not necessary to enhance the field membrane’s performance. The old adage of ‘pay me now or pay me later’ holds true when it comes to the thickness of some roofing materials, and it is encouraging building owners are increasingly recognizing the benefits of thicker membranes.
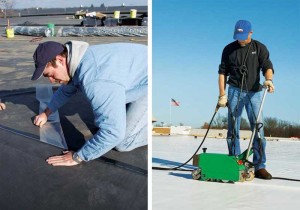
When redoing seams and flashings, nothing is more important than proper membrane preparation, regardless of thickness. The accepted method for the area to be stripped in is to scrub it using warm water and a low-sudsing soap. After the membrane has been washed, it must be rinsed with clean water and given time to dry. Next, a weathered membrane cleaner and primer coat is applied before installing a cured, pressure-sensitive EPDM cover strip that ultimately waterproofs the seam.
For fully adhered systems with large areas of delamination, the primary restoration procedure involves adhering a reinforced universal securement strip (RUSS) to the existing membrane and then mechanically fastening it at 305 mm (12 in.) on center (oc). It is used in perimeter securement on mechanically fastened, fully adhered, ballasted, and metal retrofit systems, and can also be installed horizontally and vertically with seam-fastening plates below the EPDM deck membrane for additional securement, or in conjunction with gravel stops and edging details. Many contractors favor this option over installing narrow-width perimeter sheets to meet wind-uplift requirements.

After installing the fasteners and plates, the upgraded attachment is stripped in with a cured cover strip. For areas with a small amount of delamination, fasteners can be directly installed through the existing sheet and then stripped in with a pressure-sensitive cured EPDM cover strip. For mechanically fastened systems, any loose or tented fasteners should be replaced or re-secured before completing the strip-in process.
While the restoration procedure for ballasted systems is similar to the fully adhered and mechanically attached method, the stone must first be removed from the areas in need of repair. Rakes or shovels should not be used as they can damage the field membrane. A gravel pusher or broom can clear approximately 305 mm of area on each side of the splice. After the splice has been exposed, these same strip-in procedures can be followed.
For large restoration or full recovery projects, many contractors employ an industrial vacuum to efficiently remove ballast from the roofing system, sucking it into a truck or tank on the ground. After large roof areas are re-covered or replaced, the ballast can be reloaded back onto the roof by reversing the vacuum, pumping the ballast back to the rooftop. This method creates less dust and debris within the building and the surrounding environment, while allowing ballast to be easily reused.


