Vision Reborn: Modern FRP composites restore ornamental masonry
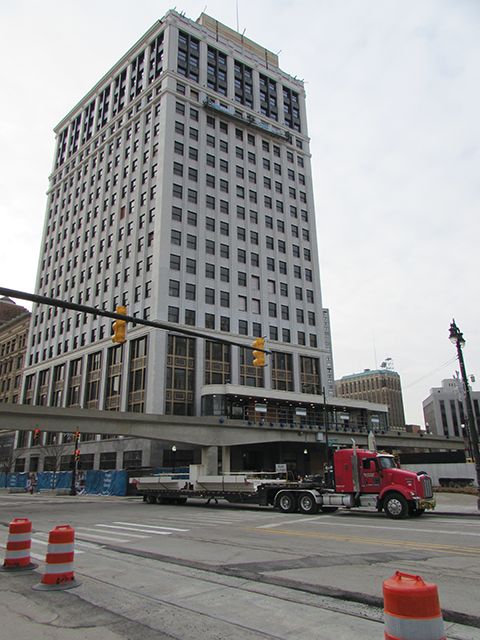
“The challenge,” explains David Di Rita, a principal of the Roxbury Group, the building’s owner, “was to bring back a 100-year old building that had never really served a modern purpose. It was never air-conditioned, the windows were never replaced. It’s all original mahogany and marble. The question was how to preserve what was remarkable about this building and yet drag it into the 21st century.”
The restoration architect, Kraemer Design Group, had access to historic architectural drawings but only via fuzzy photocopies. They also had good photography of the building from 1940. A comparison of the two sources revealed that some of the most florid aspects of the originally designed exterior ornamentation were already gone by 1940. They used the 1940 version of the building as the basis for the current restoration.
Sarah Rabe, an architect with Kraemer Design Group who was closely involved with the project, says, “We were very lucky. We were able to pull enough info off those that we’re reasonably sure they are close to what was on the building originally.”
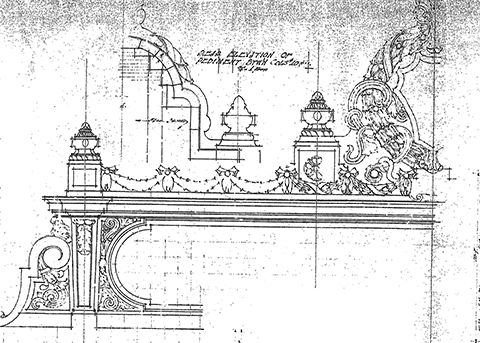
The restored elements constitute some of the main façade features of the original design. The glazed brick façade was divided by terra cotta water-tables at the fifth, 15th, and 16th floors. A terra cotta cornice adorned with bas relief lion’s heads crowned the 19th floor. There was a large sign atop the building proclaiming its name.
Restoration elements were at first detailed by the architect in sheet metal. As the project progressed, this selection was re-examined. The contractor responsible for constructing with the architect was Ram Construction—a specialty contractor in high-rise façades with extensive restoration experience. That firm had previously worked with FRP elements on restoration projects, and thought it might be a better solution than sheet metal. The head of the company, Bob Mazur, was concerned the sheet metal would begin to rust within a few years. He was also afraid of ice damage, denting, and oil-canning (i.e. a wavy deformation of a sheet metal surface supposed to be flat or smoothly curved)—any of which could mar the effect. For him, it was a matter of not only business, but also local pride.
Using FRP would allow the restoration of the lion’s heads on the cornice, which was a detail left out of the sheet-metal design as unfeasible. The lion’s heads proved to be an important factor for the owners.
Consulted about the feasibility of substitution, an FRP fabricator made a 4-m (13-ft) long mockup based on the architect’s drawings, using a mold made of micaboard to cast the FRP. A cream color, slightly warmer than the building’s white glazed brick, was selected. When the mockup was placed against the building wall, the owners declared the color “perfect.” Used on all the FRP elements of the project, it was given a fine matte finish, similar to the texture of drywall spackle.
The FRP parts cost more than sheet metal, but, according to project manager Jim Nystrand, installation cost was reduced. Sheet metal as designed required extensive wooden framing behind it to give it strength. The framing had to be constructed 60 m (200 ft) up in the air, and then have the sheet metal attached to it. The FRP water-tables and cornices were cast in the shop; they were so lightweight and strong they required only very simple framing attached to the building. A team of three or four could install eight panels a day.
Recreating the past
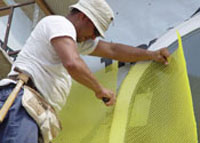
The FRP elements were fabricated using techniques employed for decades in the fiberglass industry. A pattern—essentially a full-size mockup of the final piece—is constructed in wood, with the addition of clay or other materials necessary to achieve all the desired shapes in the element. The pattern is painted for a smooth finish, and then waxed. On that pattern, a fiberglass mold is cast. The mold is a negative image of the final shape. That mold is then used to cast multiple fiberglass elements actually installed on the building.
The water-table and cornice pieces are designed with overlaps, alternating sections being either ‘overs’ or ‘unders,’ so there are two different molds for all the pieces of the cornice. The sections were either 1.8 or 2.1 m (6 or 7 ft) long—the ‘under’ sections have a lip extending behind the ‘over’ section. Large, flat areas are sandwich panels comprising two layers of 5-mm (3/16-in.) FRP surrounding a 13-mm (1/2-in.) balsa core to prevent oil-canning. Each section has a full return at the end to act as a fire stop.
Corner pieces are made simply by miter-cutting and joining straight sections. The part of a panel that gets fastened to the building is slightly thickened to 6-mm (¼-in.) FRP. Certain high-stress areas have a double thickness of FRP, but they account for only about five percent of the total surface area.
To cast a fiberglass panel, the mold is first coated with gelcoat, which both seals the surface of the fiberglass and has the finish color integrated into it. Modern gelcoats have ultraviolet light (UV)-inhibitors to protect the resins from the sun. (The material does not rot, corrode, or support mold growth.) Then, a mixture of resin and chopped glass fiber is sprayed into the mold and hand-rolled for compaction and adhesion. It cures through air exposure in two to three hours.
Sign up for our weekly newsletter
Architectural materials and methods delivered right to your inbox
- CSI News & Notes: CSI’s impact earns official recognition; celebrate leaders, mentors, and innovators; and more
- CSI News and Notes: CSI spring certification exams open; scholarships available; and more
- CSI News & Notes: CSI MSR heading to San Diego; spring certification exams open; and more
- To Be Specific: Why CDT Should Be Your First Move
- CSI News & Notes: CSI Fellows share member benefits; and a New Year’s Resolution to keep
Products

Read the Latest Issue
